Sausage Balls Without Bisquick Recipe
This post may contain affiliate links, read my disclaimer.
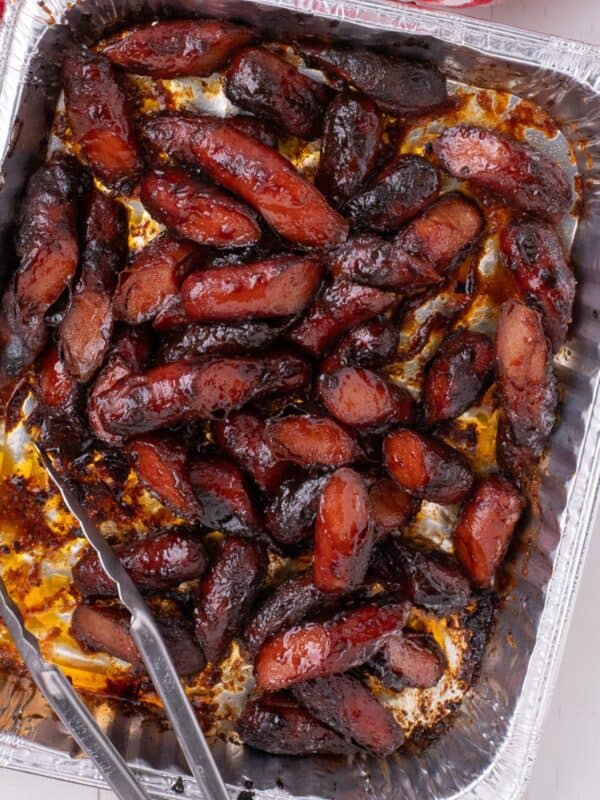
My sausage balls without Bisquick recipe is a delicious and easy update to a classic appetizer. I use sausage, flour, cream cheese, and cheddar cheese for the best flavor and a perfectly tender center!

My Easy Way to Make Cream Cheese Sausage Balls
I would love to say I went out to find a way to make my sausage balls without Bisquick recipe on purpose, but let’s be real. I forgot the Bisquick at the store, so I had to improvise. Well, it turned out to be an amazing mistake because these are all I make now!
I love making sausage balls as an appetizer for Thanksgiving and Christmas every year. It gives everyone a little to eat and a reason to leave me alone in the kitchen while I finish up making dinner.
And, honestly, making my sausage balls without Bisquick was just as good as making them with it! I didn’t have to focus the recipe around the Bisquick and added the cheesy and meaty ingredients I just love in sausage balls. My husband Ben even told me they were the best sausage balls he’s had!
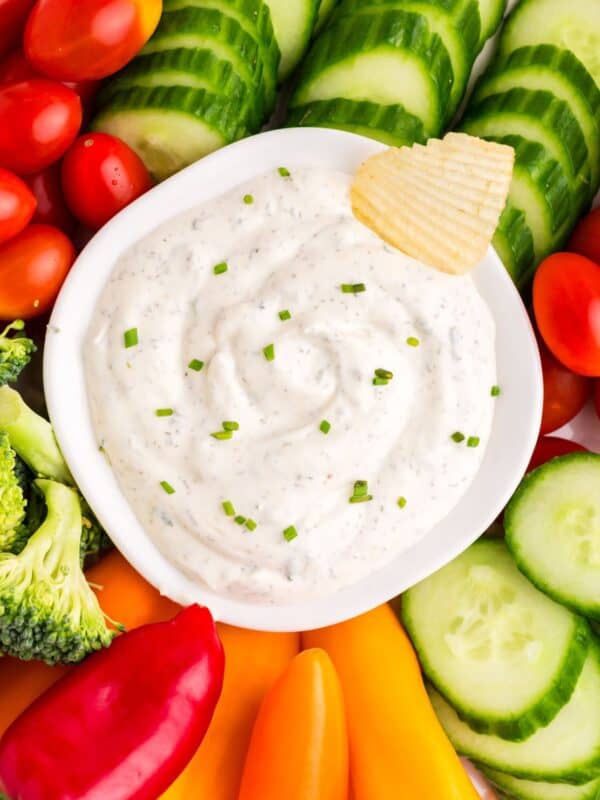
Oh, and I included my favorite dipping sauce to enjoy with them because it’s just 3 ingredients and it takes these to the next level!
If you love sausage recipes, try my recipes for sausage cream cheese dip, sausage green bean potato casserole, Italian sausage in the oven, sausage in the air fryer, and my sausage hash brown casserole with eggs.
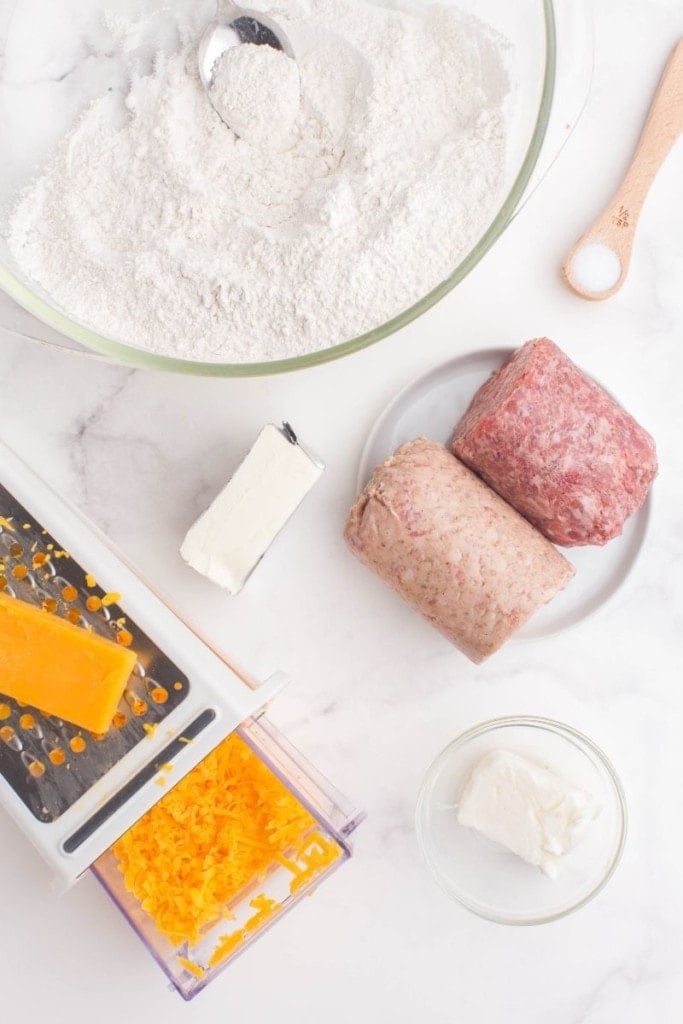
Sausage and Cheese Balls Ingredients
- Flour – I use self-rising flour as a substitute for Bisquick. Regular all-purpose flour will not work right.
- Salt – Enhances the flavor of the sausage and other ingredients.
- Breakfast sausage – I use a combination of mild and spicy breakfast sausage. All of one breakfast sausage will work great too.
- Cheddar cheese – Adds some sharpness to the sausage balls while giving them a little bit of a melty texture.
- Cream cheese – My secret for adding extra creaminess while also working to help keep the sausage balls together.
- Shortening – I find shortening gives the sausage balls the best texture, but butter can be substituted in a pinch.
- Dipping sauce – I use mayo, Dijon mustard, and honey to make a quick homemade honey mustard sauce. A store bought sauce works as well, but I love the flavor of mine so much more.
How to Make Sausage Balls Without Bisquick
A full printable version of this recipe with ingredient measurements is available at the bottom of this post.
STEP ONE: Preheat the oven to 350F degrees. Line a baking sheet with parchment paper and set aside.
STEP TWO: In a large bowl, combine the self-rising flour and salt. Cut the cream cheese and shortening into the flour until it is crumbly. Then, add the sausage and begin working it into the flour, using your hands. Add in the grated cheese and work it into the mixture until it’s evenly combined.
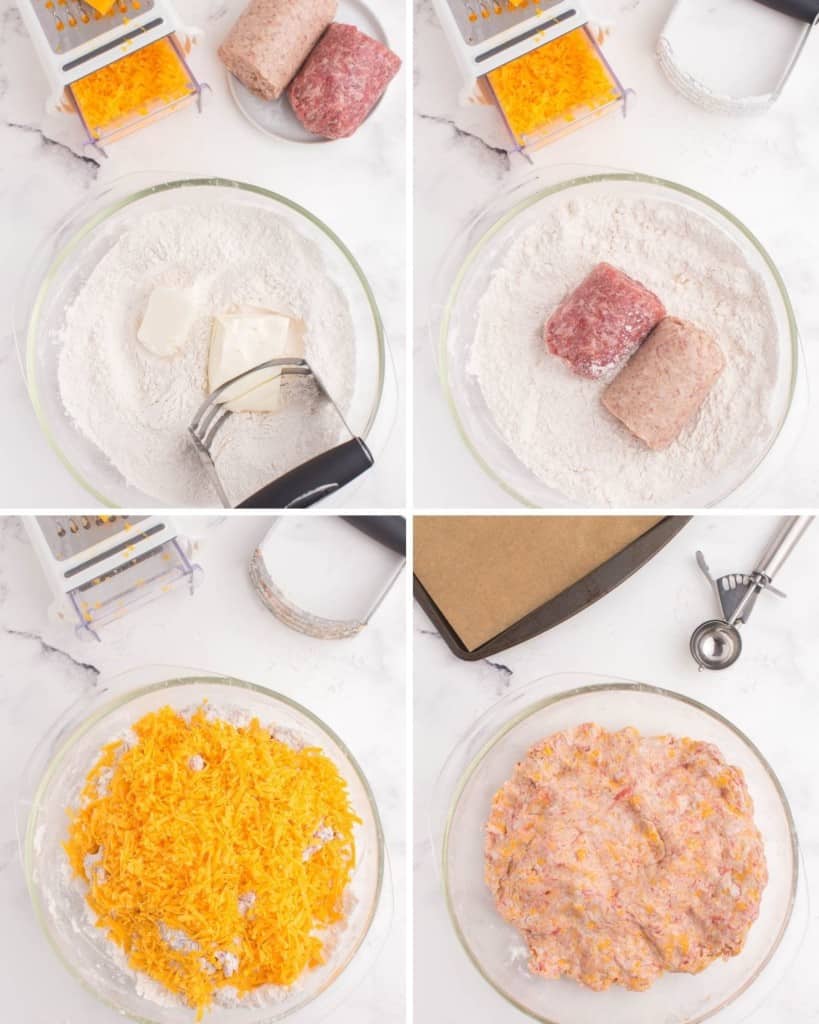
STEP THREE: Using a small cookie scoop, portion out the mixture and roll it into a ball in the palm of your hands. Place the uncooked sausage balls on the baking sheet.
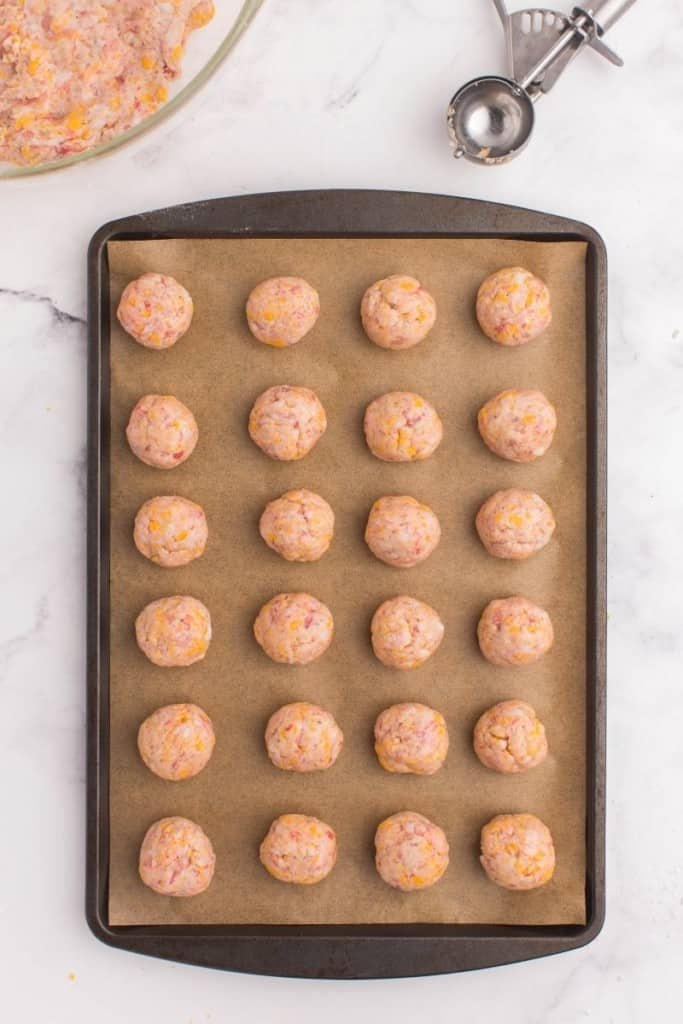
STEP FOUR: Bake them for 20 minutes or until they’re golden brown. For extra flavor, brush them with butter and sprinkle with parsley after the sausage balls are cooked.
STEP FIVE: Whisk together the mayo, Dijon mustard, and honey in a small bowl to create the honey mustard dipping sauce.

Tips for the Best Sausage Balls
- I always use good sausage. Since the fat content of ground pork sausage can vary, I like to use a reputable brand like Jimmy Dean. Ground sausage from the meat counter is another way to ensure delicious sausage balls that aren’t too greasy.
- I opt for sharp cheddar cheese when making these for a fresher flavor. Freshly grated cheese will have the most flavor, but bagged shreds are great for quick prep.
- I lightly wet my hands with water when forming the sausage balls in my palms. A little goes a long way, so just a few drops of water are more than enough to create a smooth surface.
- Use a food processor to make mixing the sausage ball ingredients easier. It makes the prep super fast!
Cream Cheese Sausage Balls Variations and Substitutions
- I love experimenting with different cheeses. I’ve used pepper jack, colby jack, and monterey jack all with success. Softer cheeses like mozzarella will not work well.
- My recipe doubles easily! Just double all the ingredients and cook as stated in my recipe.
- Swap out the mild sausage for all spicy sausage. I love doing this when I’m going to an adult-only event where my kids won’t complain that it’s too spicy. A little cayenne pepper helps add some heat, too, if spicy sausage isn’t available.
- Switch up the dipping sauce! While I love my honey mustard sauce, I also love dipping them in BBQ sauce and my kids also love just ketchup.
What to Serve With My Sausage Balls Without Bisquick Recipe
I love serving my sausage balls with the honey mustard sauce I included in the recipe. But, I do love switching things up and serving them with BBQ sauce, ranch, or spicy mayo. My son Connor loves to eat them with just ketchup, as he does with everything.

Sausage Balls Without Bisquick Recipe FAQs
Why Do My Sausage Balls Fall Apart?
Sausage balls typically fall apart when there’s too much flour. Make sure to measure the flour in my recipe by spooning out the flour into the measuring cup to avoid packing it and over-measuring it.
How to Store Leftovers
I store leftover sausage balls in the refrigerator in an airtight container for 3 to 4 days. They also store great frozen for up to 1 to 2 months.

More Easy Appetizer Recipes
- Baked chicken wings
- Air fryer bacon jalapenos
- Meatballs with grape jelly and BBQ sauce
- 7 layer taco dip
- Cool whip fruit dip
- Pizza dip

Easy Sausage Balls Without Bisquick Recipe
Ingredients
- 2 cups self-rising flour
- 1/2 teaspoon salt
- 8 ounces mild breakfast sausage
- 8 ounces spicy breakfast sausage
- 2 cups shredded cheddar cheese
- 4 ounces cream cheese, softened
- 2 tablespoons shortening
Optional
- 3 tablespoons butter, melted
- 1/2 tablespoon finely chopped parsley, fresh
Honey Mustard Dip
- 1/4 cup mayonnaise
- 2 tablespoons dijon mustard
- 2 tablespoons honey
Instructions
- Preheat the oven to 350 degrees F and line a baking sheet with parchment paper and set it aside.
- In a large bowl, combine the flour and Cut in the cream cheese and the shortening into the flour until it is crumbly.
- Add the sausage and begin incorporating it into the flour using your hands or a stand mixer. Add in the grated cheese and work it into the mixture till it is evenly combined.
- Using a mini ice cream scoop, scoop out the mixture and roll it into a ball in the palm of your hands. Place them on the baking sheet.
- Bake them for 20 minutes until they are golden brown. Brush them with melted butter and sprinkle with parsley if desired, then serve!
Notes
- Always use good sausage. Since the fat content of ground pork sausage can vary, use a reputable brand like Jimmy Dean. Ground sausage from the meat counter is another way to ensure delicious sausage balls that aren’t too greasy.
- Opt for sharp cheddar cheese when making these for a fresher flavor.
- Lightly wet your hands with water when forming the sausage balls in your palms. A little goes a long way, so just a few drops of water are more than enough to create a smooth surface.
- Use a food processor to make mixing the sausage ball ingredients easier. It makes the prep super fast!
- Store leftovers in the fridge in an airtight container for 3 to 4 days. They also store great frozen for up to 1 to 2 months
Nutrition
This nutrition information is based on the exact products I used in this recipe. Brands and sizes of products could alter exact nutrition and should always be calculated independently.
Like this? Leave a comment below!


These were so good and so easy!
That was delicious. I’ll be making this again for my kids.
Hi Samantha! Thanks for a delicious-sounding recipe. I don’t stock self-rising flour. The bags sold are too much to keep. Do you think making the additions to AP flour would be okay? Thanks, and Happy New Year! Rochelle
Hi Rochelle, Yes, you can make you own self rising flour by adding 1 Tablespoon of baking powder and a generous pinch of salt to the recipe. Enjoy!