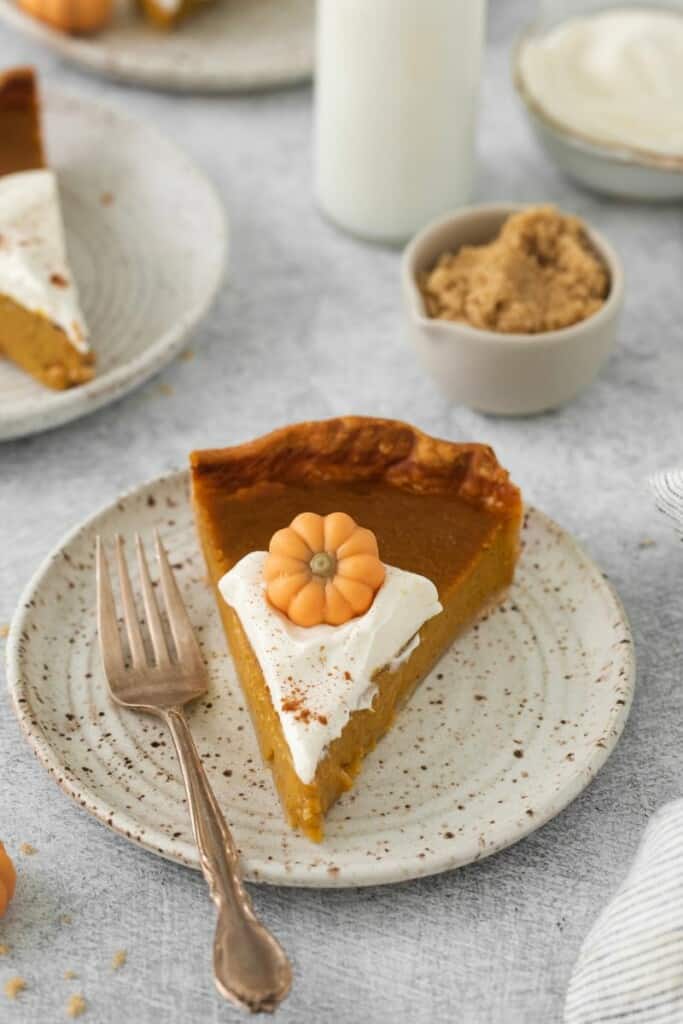
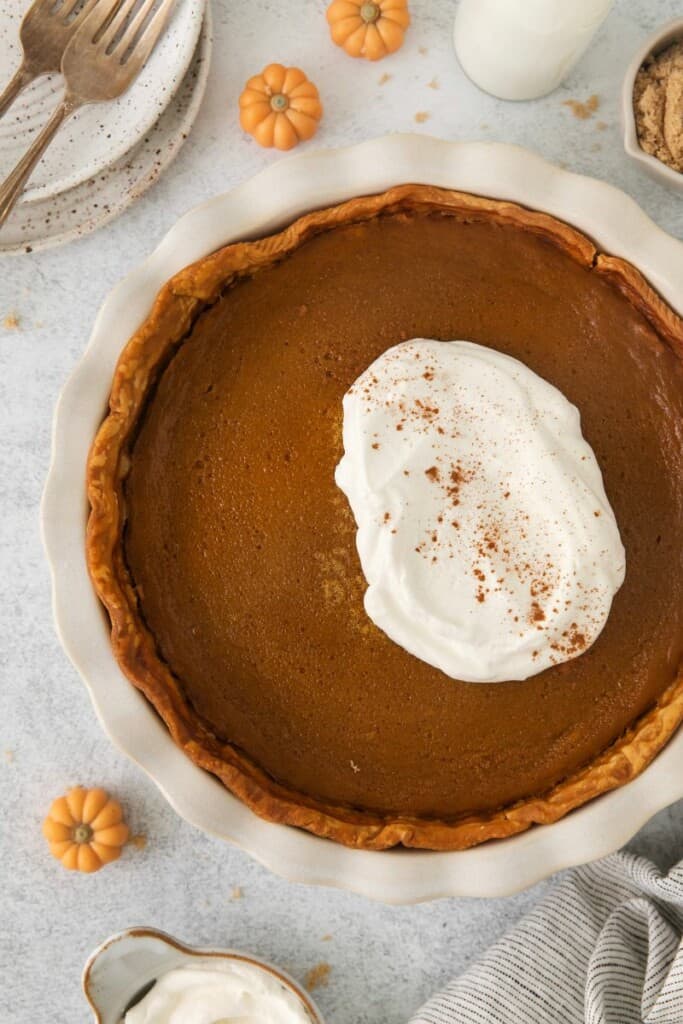
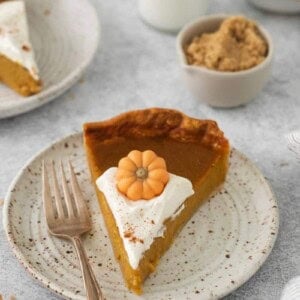
Pumpkin Pie Without Evaporated Milk
This post may contain affiliate links, read my disclaimer.

Finding the right substitute for evaporated milk in pumpkin pie can be tricky, but our easy pumpkin pie without evaporated milk is just as tasty and luxurious as any other!
Sometimes we completely forget to swing by the canned milk while grocery shopping… it happens! Especially when we all have holiday brain! In this case, you can turn to our pumpkin pie recipe without evaporated milk and no condensed milk.
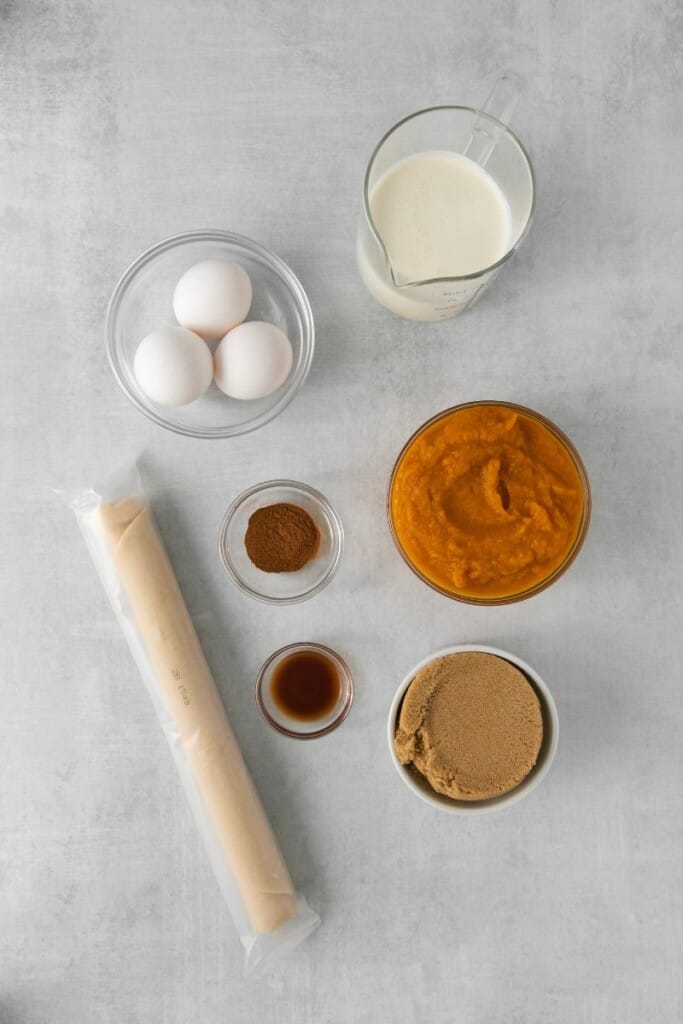
A few simple pantry ingredients are all you need for the perfect pumpkin pie without evaporated milk: vanilla and brown sugar deepen the sweetness, eggs build an indulgent custard texture, and our substitute for evaporated milk in this pumpkin pie – heavy cream — makes each bite so rich and moist.
If you made your own pumpkin puree at home instead of canned pumpkin, don’t forget to pop those seeds into the air fryer for a nutritious snack! And here are some other ideas for your leftover pumpkin pie filling if you have any.
How to Make Pumpkin Pie Without Evaporated Milk
A full printable version of this recipe with ingredient measurements is available at the bottom of this post.
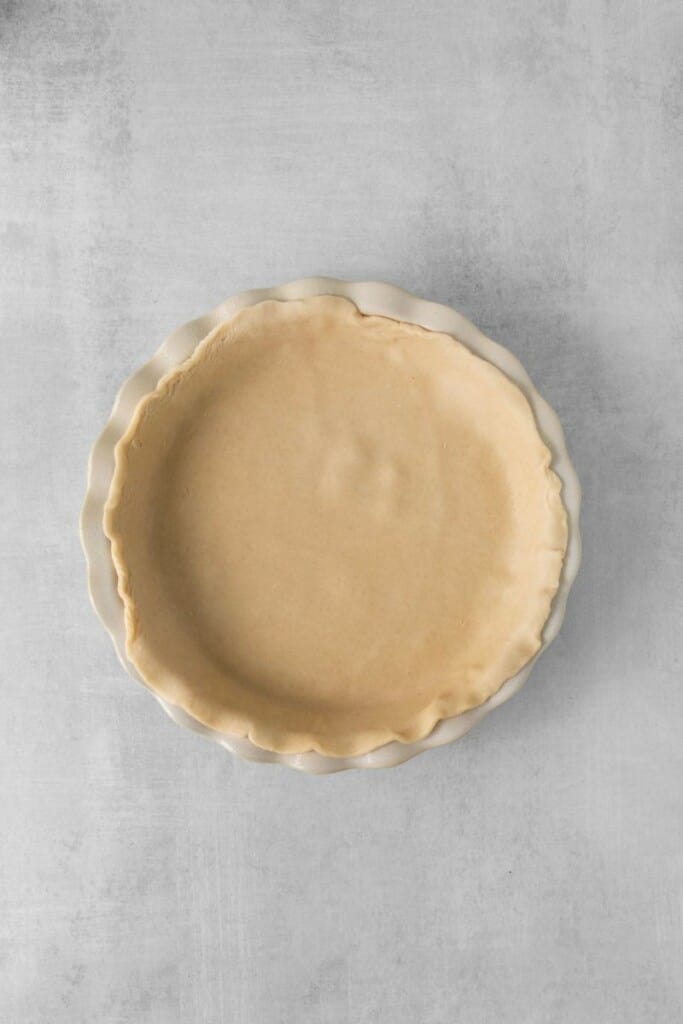
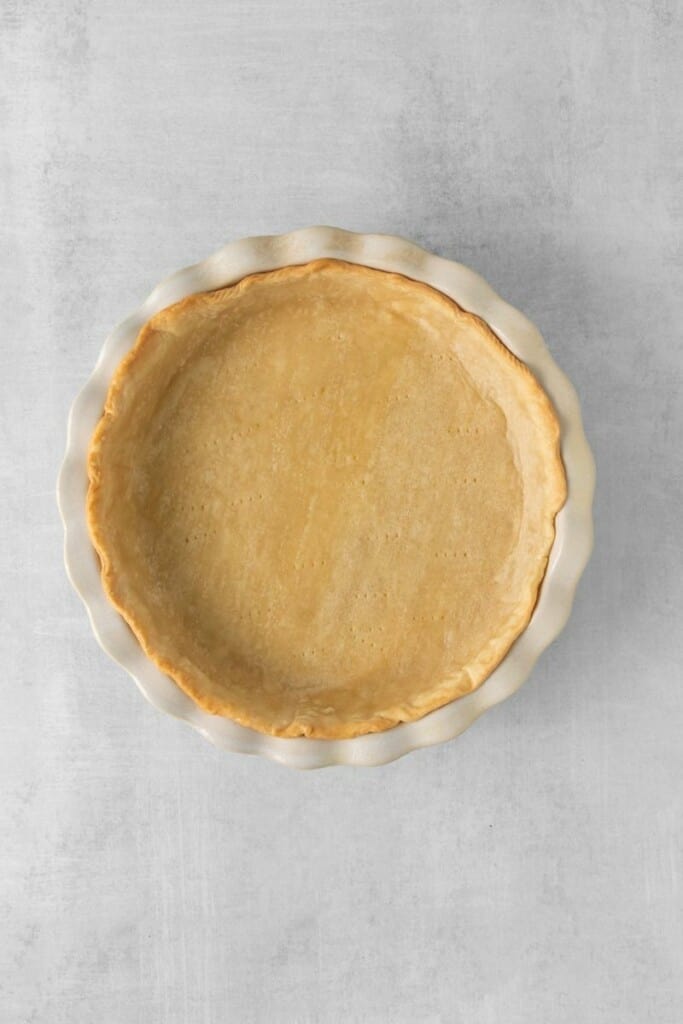
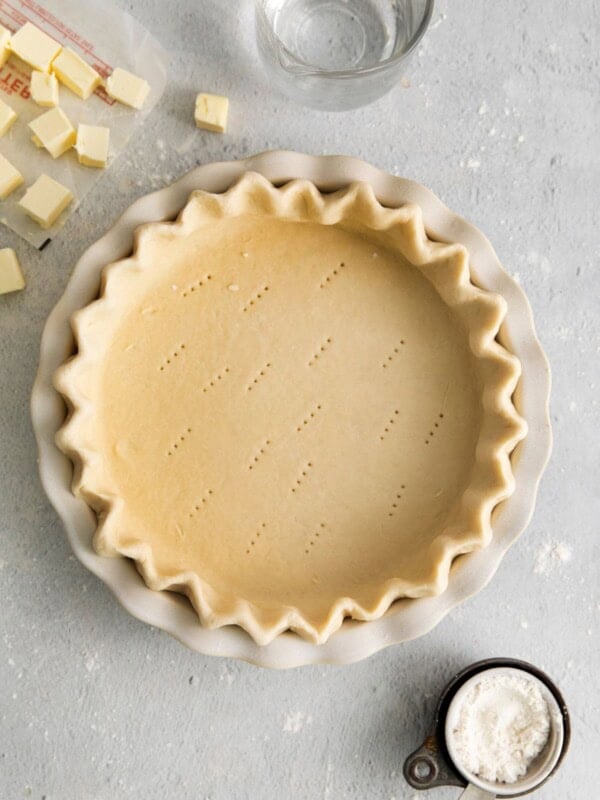
STEP ONE: Prepare by preheating the oven to 350F and spraying a pie pan with a thin coating of cooking spray. Lay the pie crust in the pan and press to adhere, crimping the edges.
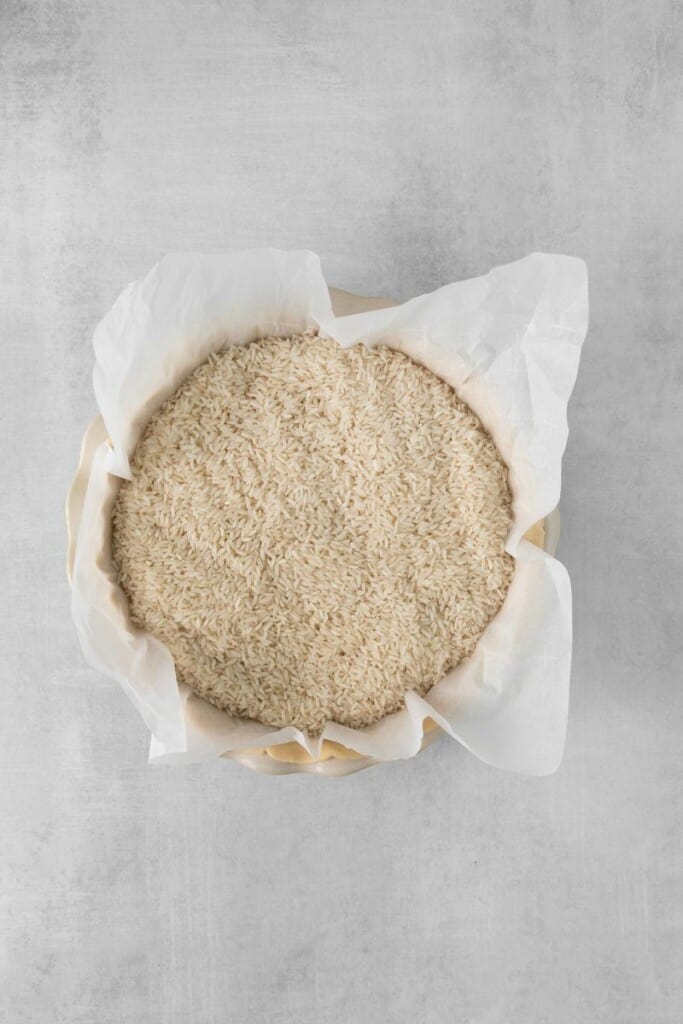
Finally, line the crust with parchment paper and weigh it down with pie weights (dried beans are a good substitute if you don’t have weights).
STEP TWO: Par-bake the crust for 20 minutes. Remove from the oven and let cool briefly before adding the filling.
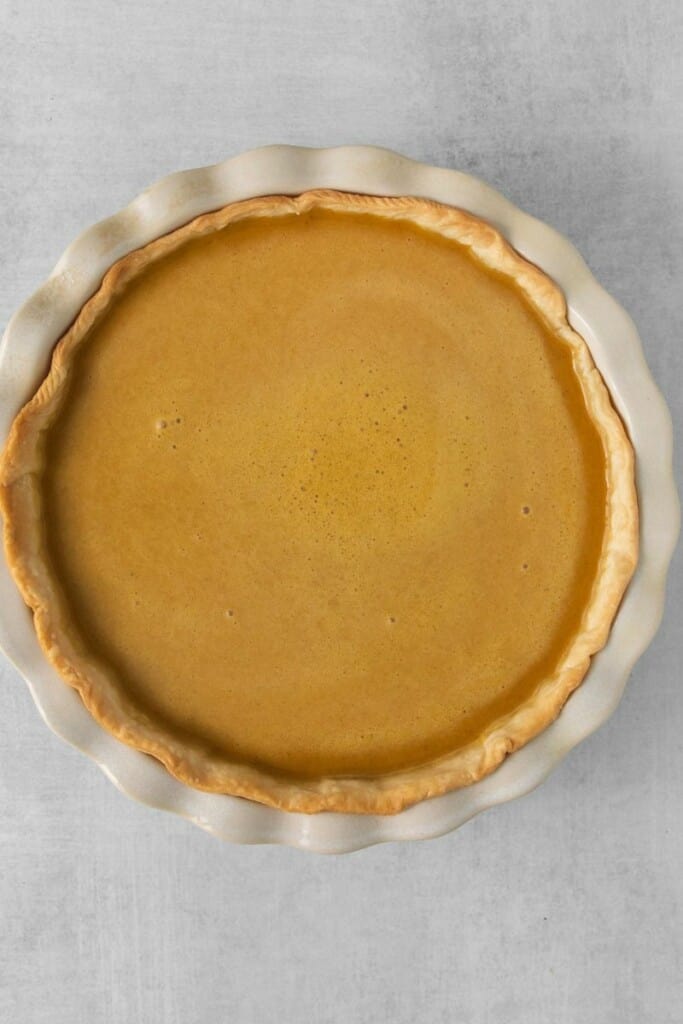
STEP THREE: Add the pumpkin, cream, sugar, eggs, spice, and vanilla to a large bowl and whisk until smooth. Pour the mixture into the par-baked crust and shake the pan gently to help it spread evenly.
Return the pan to the oven and bake for 55 to 60 minutes. Once the surface barely jiggles when shaken, it’s done.
STEP FOUR: Let the baked pie cool to room temperature before chilling in the fridge for another 4 hours.
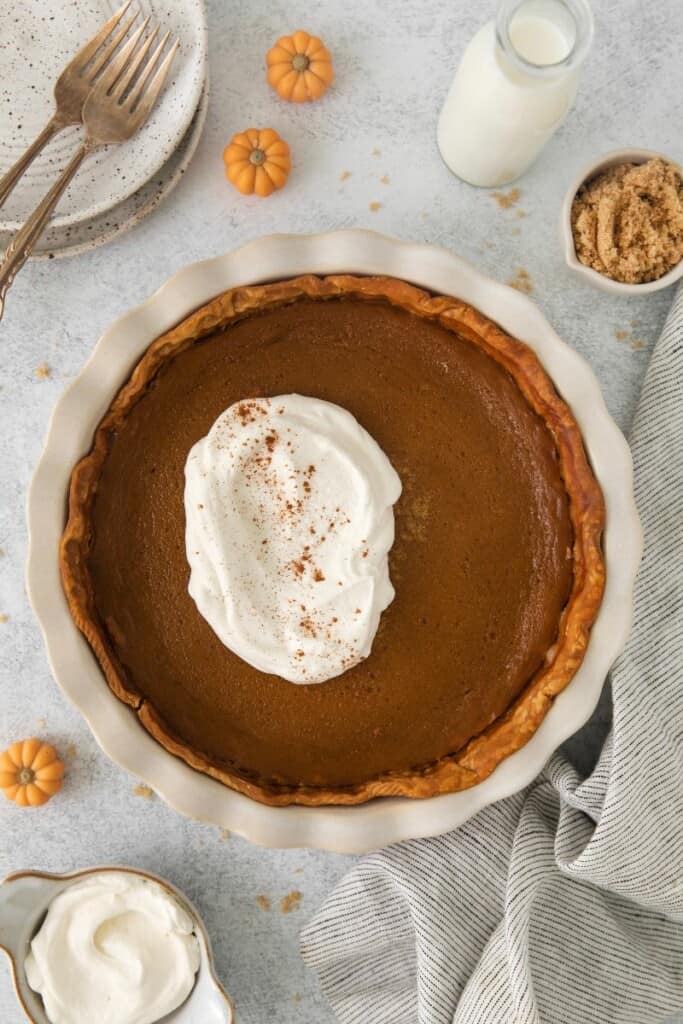
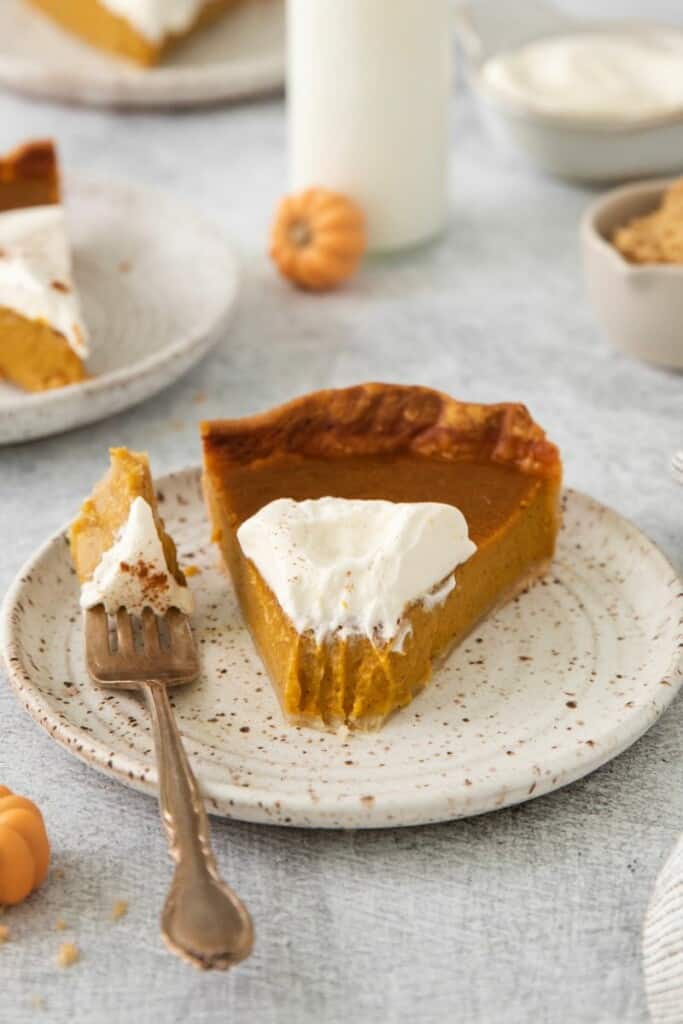
STEP FIVE: Serve with ice cream or whipped cream, and enjoy!
Why Is Evaporated Milk In Pumpkin Pie?
The main purpose of evaporated milk in pumpkin pie is to keep the filling thick as it heats up, preventing it from becoming too runny and soupy. Condensed milk has the same purpose.
Once that is understood, it’s easier to find a substitute pumpkin pie recipe without evaporated milk or condensed.
What Can I Use Instead Of Evaporated Milk In Pumpkin Pie?
It’s a common misconception that condensed milk can be used in place of evaporated milk in any recipe. In reality, the two are very different – condensed milk is thick and sweet, while evaporated milk is just slightly thicker, unsweetened milk.
You’re better off finding a pumpkin pie recipe that features condensed milk rather than using it as a substitute for evaporated milk in pumpkin pie.
If you’d like a pumpkin pie recipe without condensed milk or evaporated milk, try one of these options:
- Heavy Cream
- 1% or 2% Milk
- Whole Milk
- Almond Milk
- Half & Half
We use heavy cream in order to make our pumpkin pie without evaporated milk because of its rich flavor that yields a pleasantly light filling.
A good non dairy substitute for evaporated milk in pumpkin pie is almond milk – the sweet, nutty flavor goes so well with pumpkin pie spice! Oat milk works, too, as does coconut milk. These all have their own unique flavors to consider.
How Do I Keep My Pumpkin Pie From Cracking On Top?
Pumpkin pie cracks when it’s overcooked. One of the biggest mistakes that home bakers make is waiting for the pie to look fully cooked before pulling it out, and a cracked surface is a tell-tale sign.
To prevent the surface from cracking, remove the pie from the oven while the surface is still somewhat jiggly and not quite firm. It will continue cooking just slightly as it cools, leaving you with the perfect presentation.
If your pumpkin pie is too watery on top, then you took it out too soon.
How Do You Store Pumpkin Pie Without Evaporated Milk?
Like any custard-based pie, a pumpkin pie without evaporated milk should be refrigerated. The same goes for a pumpkin pie recipe without condensed milk – at the end of the day, it still contains dairy and eggs. Cover well and refrigerate for up to 4 days.
Pumpkin pie without evaporated milk can also be frozen for up to one month. If you’d like to freeze it before baking, it will keep in the freezer for just as long. The un-baked custard will also last for a few days in the fridge – just wait to add it to the crust until it’s par-baked.
More Pie Recipes
- 3 Ingredient Pie Crust Recipe
- Cinnamon Roll Apple Pie
- Peach Pie with Canned Peaches
- Easy Peanut Butter Pie
- Coconut Cream Pie Recipe
- Jello Lemon Meringue Pie
- Sweet Potato Pie with Canned Yams
- Pecan Pie Without Corn Syrup
More Pumpkin Recipes
- Pumpkin Bread with Cream Cheese Frosting
- Pumpkin Spice Donuts
- Pumpkin Snickerdoodles
- Pumpkin Cheesecake Cookies
- Pumpkin Cream Cheese Dip
- 3 Ingredient Pumpkin Muffins
- 5-Ingredient Pumpkin Bread
- Ideas to Use Leftover Pumpkin Filling
Pumpkin Pie without Evaporated Milk
Ingredients
- 1 9 ” deep dish pie crust, homemade or store-bought
- 1 can, 15 ounces pumpkin puree
- 1 ¼ cups heavy cream
- 1 cup light brown sugar, lightly packed
- 3 large eggs
- 2 teaspoons pumpkin pie spice
- 1 teaspoon pure vanilla extract
Instructions
- Preheat the oven to 350 F and lightly grease a pie pan with nonstick baking spray. Place the pie crust in your greased pan and crimp or flute the edges. Line the pie crust with parchment paper and fill the center with dried beans or pie weights.
- Bake the crust for 20 minutes.
- In a large bowl, whisk together the remaining ingredients (pumpkin, heavy cream, brown sugar, eggs, pie spice, and vanilla) until smooth. Pour the pumpkin mixture into the par-baked crust and bake for 55-60 minutes, or until the center of the pie barely jiggles when shaken.
- Remove the pie from the oven and allow it to cool completely to room temperature. Then transfer it to the fridge and chill for at least 4 hours.
- Serve garnished with a dollop of fresh whipped cream and enjoy.
Notes
Nutrition
This nutrition information is based on the exact products I used in this recipe. Brands and sizes of products could alter exact nutrition and should always be calculated independently.
Like this? Leave a comment below!


Hi. Do you bake the pie crust with the dry breans/rice for weight?
Hi Kimberly, Yes, I use pie weights to bake my crust. Both dry beans and uncooked rice work great for this!