Ninja Foodi Mac and Cheese
This post may contain affiliate links, read my disclaimer.
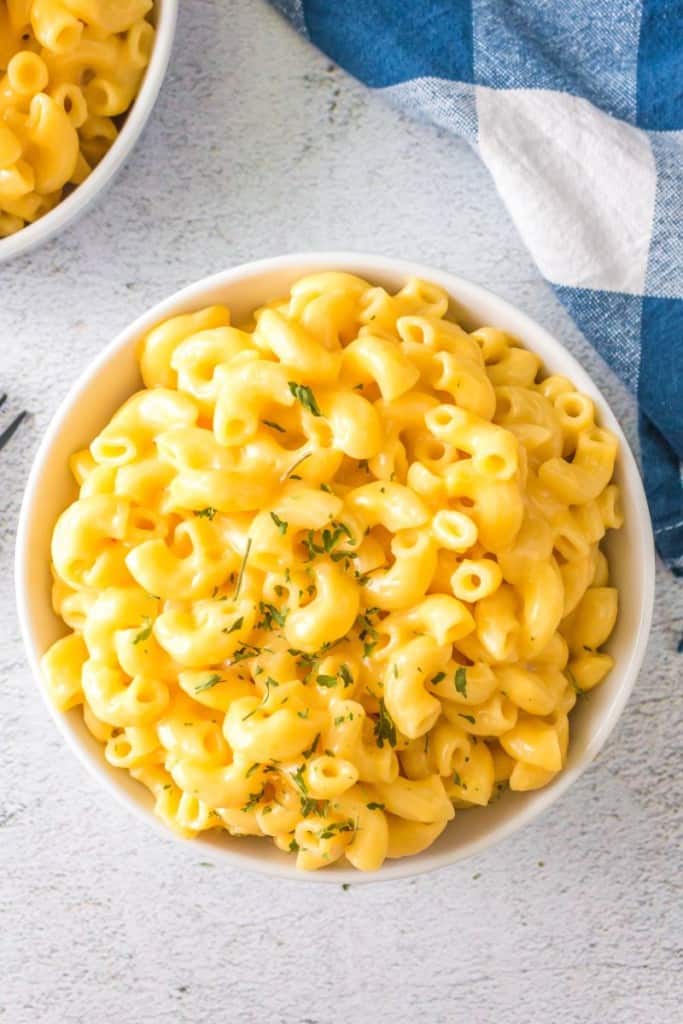
Ditch the boxed version and whip up a batch of rich and cheesy Ninja Foodi mac and cheese from scratch! The recipe is super simple, but the results are absolutely divine.
As a kid that grew up in the 90s, “blue box” Kraft mac and cheese was always a comfort food for me.
But once I tried super easy Ninja Foodi mac and cheese, I knew I would never go back!
This recipe is crazy simple to whip up. And instead of pouring powdered cheese from a bag, you get to soak up all the rich goodness of real cheese!
Best of all, it can be ready in about 15 minutes, and that might be even faster than the boxed stuff.
Here’s what I’m going to teach you in this post:
- How to make the easiest, most delicious pressure cooker mac and cheese using the Ninja Foodi
- What cheeses or cheese blends I recommend for the best results
- Ideas for adding more seasoning or using different types of pasta
- How to make Instant Pot mac and cheese if you don’t have a Ninja Foodi pressure cooker
- What to serve with Ninja Foodi mac and cheese
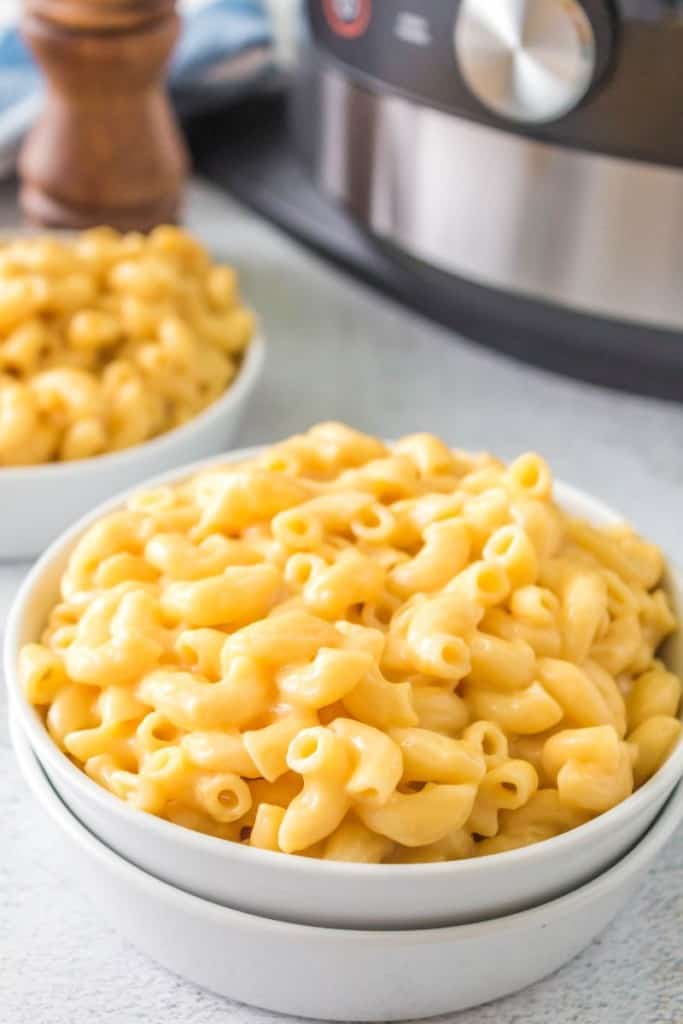
When I need a quick and easy dinner, the whole family is guaranteed to devour; this homemade mac and cheese never fails.
The pressure cooker cooks the pasta much faster than boiling on the stove, and the rich blend of butter, evaporated milk, and cheese is nothing short of divine.
It’s sure to be an instant family favorite!
I used a Ninja Foodi air fryer/pressure cooker combo appliance for this recipe.
How to Make Mac and Cheese in the Ninja Foodi
A full printable version of this recipe with ingredient measurements is available at the bottom of this post.
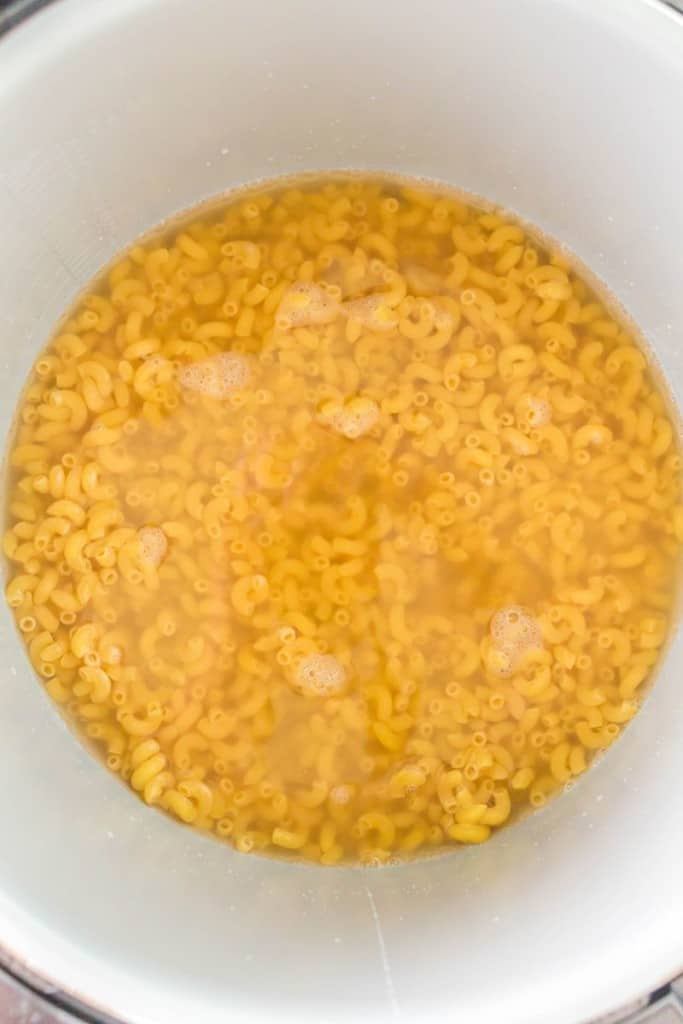
STEP ONE: Add the uncooked pasta to the Foodie Ninja ceramic coated inner bowl.
STEP TWO: Pour the chicken broth over the pasta. Mix with a wooden spoon, ensuring the noodles are not stuck together.
STEP THREE: Close the lid. Slide to Pressure.
STEP FOUR: Make sure the valve is set to SEALED and cook on High Pressure for 4 minutes.
STEP FIVE: Once the 4 minutes are up, release the pressure manually.
STEP SIX: Add the butter. Mix with the spoon until all noodles are well-coated.

STEP SEVEN: Pour the evaporated milk over the pasta and mix.
STEP EIGHT: Add the shredded cheese, then stir until the cheese is all melted.
STEP NINE: Top with more cheese and fresh herbs if desired, then serve and enjoy!

Can You Make Mac and Cheese in a Ninja Foodi?
Yes, yes, and once more, YES! The pressure cooker function is one of the most convenient ways to cook pasta in a matter of minutes, and there’s no waiting for the water to come to a boil on the stove. How nice is that?
Once the pasta is ready, you can add all the other ingredients right to the Ninja Foodi. Give it a stir, make sure the cheese is melted, and you’re ready to serve.
It seriously couldn’t be easier!
What Kind of Cheese Works Best for Mac and Cheese?
The best part about this recipe is that you can choose any blend you like! Cheeses like mozzarella, colby, or pepper jack melt really well and turn out great every time.
You can definitely use classic cheddar, but make sure to mix it with another kind of cheese. Cheddar has a lower fat content, which makes it more likely to separate.
Mixing it with a higher-fat cheese will help everything melt without separating.
Finally, I highly recommend shredding your cheese at home. Pre-shredded cheese contains anti-caking agents that prevent it from melting as nicely.
On the other hand, freshly-shredded cheese will melt much easier and get very ooey-gooey. That’s just what we want!

Can I Add More Seasoning to my Mac and Cheese?
You bet! Garlic powder or onion powder will both add some flavor with a bit of sweetness. Celery seeds would be a great option to give the dish a little freshness.
You can even add some parsley or Italian seasoning if you like!
I’ve even added cream cheese to my mac and cheese and it’s turned out delicious!
What Pasta Works Best For Mac and Cheese in a Ninja Foodi Grill?
I suggested elbow macaroni in this recipe for a very classic preparation, but you can use any type of pasta you like!
Remember that the cooking time will vary slightly depending on what you use.
Elbow pasta only needs about 4 minutes at high pressure, while cellentani, also called cavatappi, should cook for 6 minutes.
If you use another type like rotini or penne, the cooking time may need to be adjusted.
Can You Make This Recipe With an Instant Pot?
Absolutely! The Ninja Foodi pressure cooking function works like an Instant Pot or any other electric pressure cooker.
If you want to make Instant Pot mac and cheese, you can follow the same recipe!
What to Serve with Pressure Cooker Mac and Cheese
- Air Fryer Loaded Tater Tots
- Air Fryer Sweet and Spicy Brussels Sprouts
- Broccoli Salad
- Ninja Foodi French Fries
- Easy Homemade Garlic Cheese Bread
- Frozen Broccoli in the Air Fryer
Other Mac and Cheese Recipes You’ll Love:
- 5-Ingredient Instant Pot Mac and Cheese
- Buffalo Chicken Mac and Cheese
- Crockpot Mac and Cheese
- No Bake Mac and Cheese
- Mac and Cheese Without Milk
- Mac and Cheese Stuffed Acorn Squash
- Mac and Cheese with Cream Cheese
- Easy Stove Top Mac and Cheese

Ninja Foodi Mac and Cheese
Ingredients
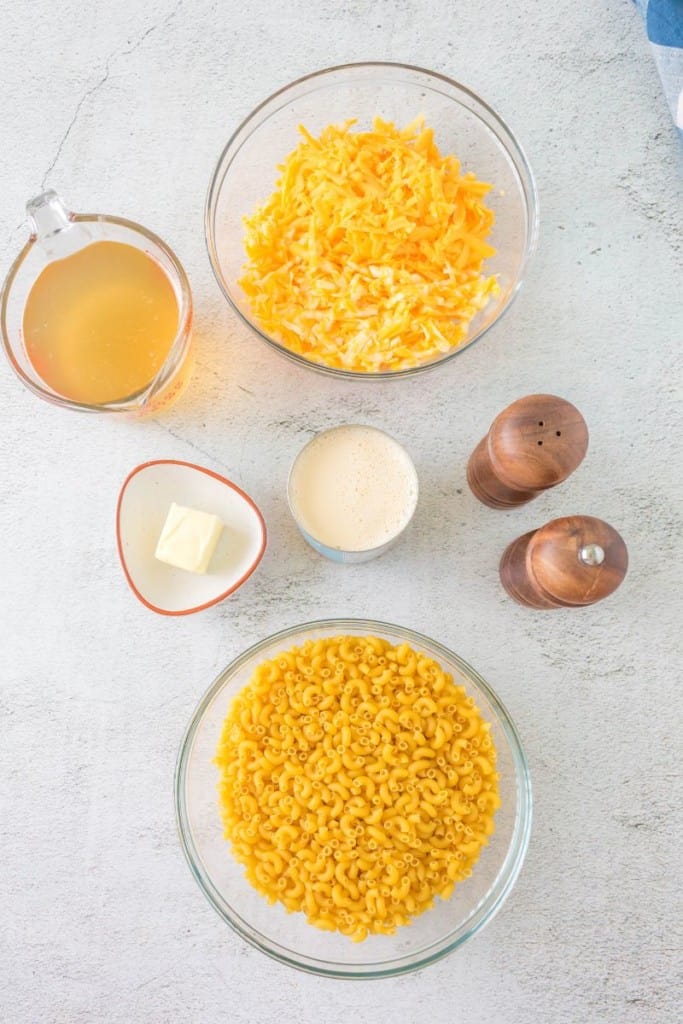
- 1 box, 16 ounces elbow pasta, uncooked
- 4 cups chicken broth, see note below
- 2 tablespoons butter, unsalted or salted does not matter, I used salted
- 1 can, 12 ounces. evaporated milk.
- 3 cups of cheese (I used 1 ½ cup Colby Jack and 1 ½ cup mild cheddar
- Salt and Pepper to taste.
Instructions
- Pour the uncooked pasta into the Foodi Ninja ceramic coated inner, aka the gray bowl.
- Pour the chicken broth over.
- Mix with a wooden spoon to release all pasta and make sure none are stuck together
- Close the lid. Slide to Pressure.
- Cook on High Pressure for 4 minutes. Make sure the valve is SEALED
- Once the 4 minutes are done, release the pressure manually.
- Add the butter and mix with the spoon to coat.
- Pour in the evaporated milk and mix.
- Add the shredded cheese and mix until the cheese is all melted.
- Serve and Enjoy!
Notes
Nutrition
This nutrition information is based on the exact products I used in this recipe. Brands and sizes of products could alter exact nutrition and should always be calculated independently.
Like this? Leave a comment below!


I have tried a few stove top recipes for Mac and Cheese and my 8 year old has never loved it and reverts to the packet stuff which I am not keen on. This was so easy and a complete hit with our daughter.
I made this tonight. So easy and the whole family loved it. I add in some left over shredded chicken before I added the cheese. It was really good!
Hey Rita, That sounds really tasty! So glad you enjoyed it.
Thank You so much for this recipe!!! I made it with gluten free pasta so I cut 1 minute off, it worked perfectly! We added can tomatoes at the end and the liquid (juice) and it was so good!!!!!! THANKS AGAIN!!!
Hi Gloria, I’m so glad you love it! Thanks for letting me know that this works with gluten-free pasta too.
I followed the recipe with little change (I used a mix of cheddar, American and a little less than a quarter of cream cheese). The pasta was really, really soft and there was lots of liquid swimming around the pot. No way I could add the condensed milk……would’ve been soup.
What in the world did I do wrong?
Hi Jac, It sounds like your pasta didn’t absorb as much liquid as mine did. Check out the image in step 6 of the recipe above for reference. If that is the case, some of the excess broth could be poured out to prevent your mac and cheese from becoming soupy. I hope this helps!
Too sweet
Hi Kylie, Sorry to hear this. There aren’t any “sweet” ingredients in this recipe. Is it possible you used condensed milk instead of evaporated milk?
OMG i just checked with the ladies at my work and I’ve used condensed milk. I came back here to say I am so sorry. I will try this again. And leave a review. I don’t know whether to laugh or cry.
Oh no! That explains a lot about the sweet taste. It happens to the best of us, so don’t be too hard on yourself!