Air Fryer Roasted Garlic
This post may contain affiliate links, read my disclaimer.
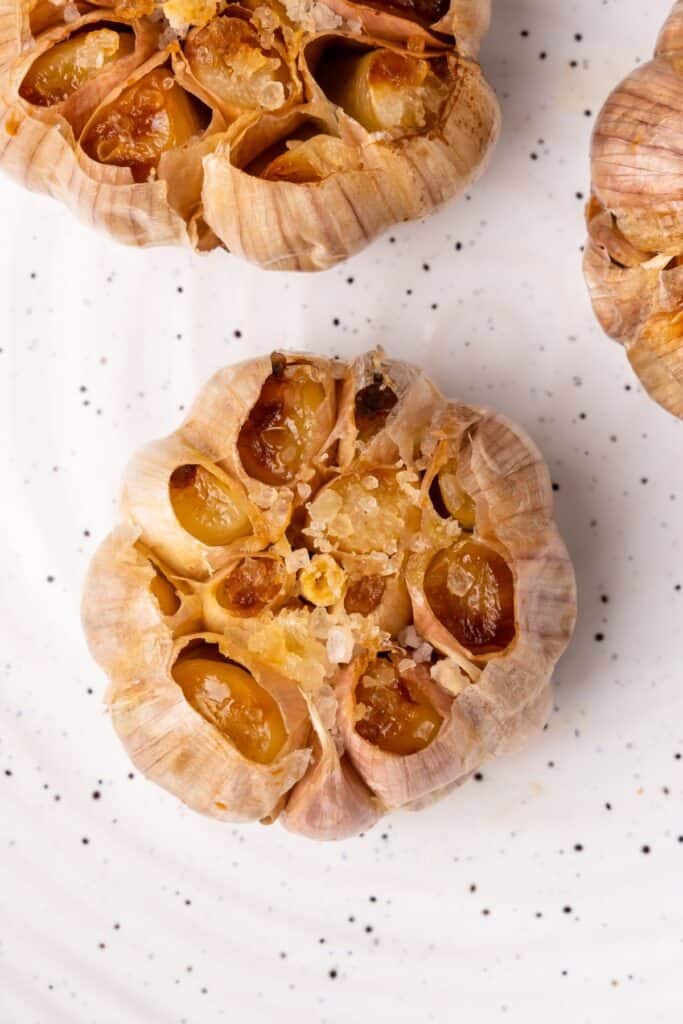
My air fryer roasted garlic has that slightly-sweet caramelized finish that makes it so irresistible. I use it in sauces, pasta, sandwiches, and so much more!
My Easy Way to Make Roasted Garlic in the Air Fryer
The first time I made air fryer roasted garlic was during Thanksgiving when every burner on my stove and the entire oven were already full. I realized at the last minute that some caramelized roast garlic would really take my mashed potatoes to the next level, so I turned to the air fryer.
I wrapped up a few garlic heads with olive oil and salt, set the timer, and before I knew it, the kitchen was filled with that incredible roasted aroma. It smelled even better than the turkey! I was so happy (and a little relieved) when the cloves turned out buttery and tender, just like the oven version, but in a fraction of the time.
Since then, I’ve started making roasted garlic this way all year round. I’ve tried oven roasting and even experimented roasting garlic on the grill, but the air fryer is hands-down the quickest, easiest method while still giving me the deep caramelized flavor I love!
For more air fryer garlic recipes, be sure to check out my air fryer garlic knots, air fryer garlic parmesan wings, and air fryer honey garlic pork chops!
Roasting Garlic in the Air Fryer Ingredients
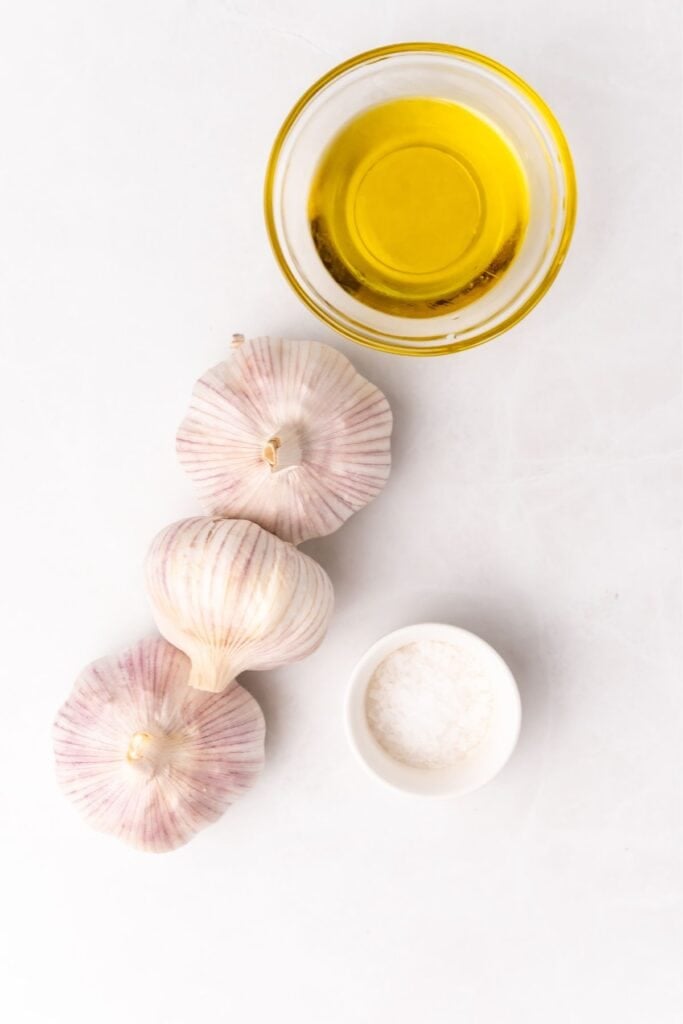
- Garlic bulbs – I use whole heads of garlic! Roasting them this way turns the cloves soft, sweet, and spreadable.
- Olive oil – A drizzle helps the garlic caramelize and keeps it from drying out. Extra virgin olive oil gives me the richest flavor.
- Salt – Just a pinch of salt brings out the natural sweetness of the garlic. I like using kosher salt, but sea salt works too.
How to Roast Garlic in the Air Fryer
A full printable version of this recipe with ingredient measurements is available at the bottom of this post.
STEP ONE: Preheat the air fryer to 400 degrees F.
STEP TWO: Carefully slice the tops off the garlic bulbs so the cloves inside are exposed.
STEP THREE: Drizzle the olive oil over each garlic bulb, making sure all the cloves are covered in oil.
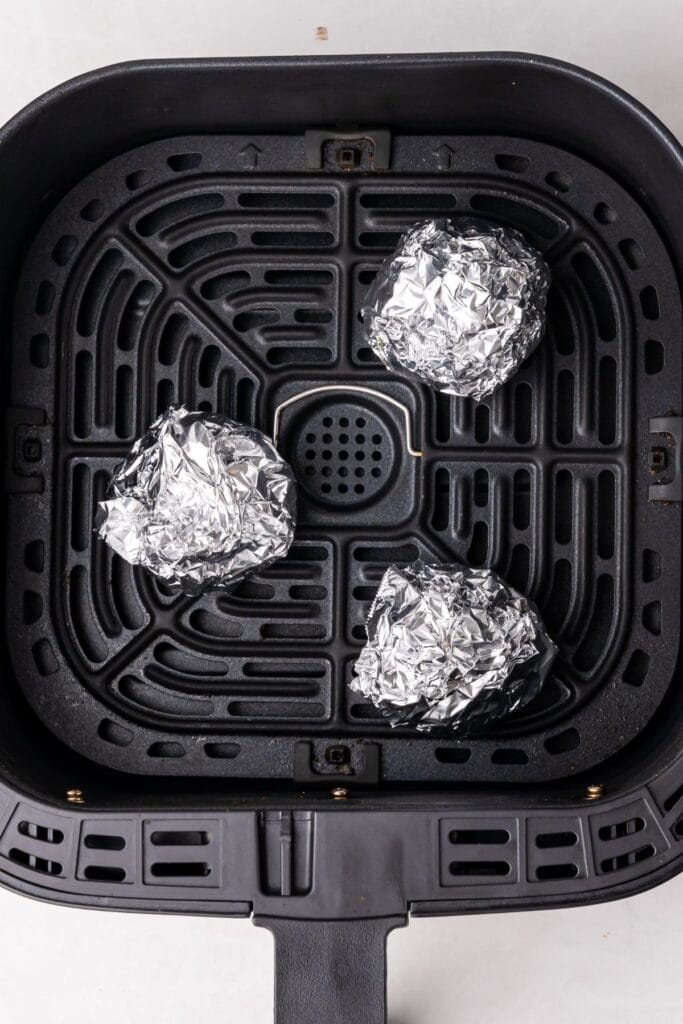
STEP FOUR: Sprinkle salt on each bulb, then tightly wrap each bulb in tin foil.
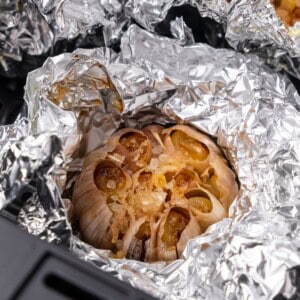
STEP FIVE: Place the garlic in the air fryer basket and air fry it for 18-20 minutes until the garlic is tender.
STEP SIX: Allow the garlic to cool until you can comfortably handle the bulbs. Remove the cloves from the papery skin.

Tips and tricks for the Best Air Fryer Roasted Garlic
- I look for firm heads of garlic with tight, papery skin and no green sprouts.
- I slice off just enough of the top of the garlic head to expose each clove and try to make the cut as straight as possible.
- For the best taste, I use a good quality extra virgin olive oil so the flavor can really shine through.
- Each head of garlic should be wrapped tightly in foil so the garlic steams while it roasts. This is what makes the garlic cloves soft and tender.
- I’ve learned to let the roast garlic cool for a few minutes so I don’t burn my fingers when squeezing out the cloves. I also use tongs to pull the heads out of the air fryer.
Roasting Garlic in the Air Fryer Variations and substitutions
- For an aromatic twist, I’ll tuck fresh herbs like sprigs of rosemary or thyme into the foil to give the garlic a beautiful flavor.
- I love using infused olive oils to drizzle over the garlic before roasting. Chili oil or lemon oil are my favorites for extra punch.
- If I’m out of foil, I’ll wrap the garlic bulb in parchment paper and tie it with baker’s twine.
- I sometimes sprinkle black pepper over the garlic for a subtle warmth and bite that goes beautifully with the caramelized flavor.
- For a touch of sweetness and tang, I’ll drizzle balsamic vinegar over the garlic heads along with the olive oil.
How to Use Roasted Garlic
One of my favorite easy ways to enjoy my roasted garlic recipe is to use it in place of fresh garlic in my air fryer garlic bread, air fryer garlic knots, or garlic cheese bread!
I also love beating it into mashed potatoes, mixing it with butter to serve over air fryer garlic butter salmon or air fryer vegetables, or combining it with mayonnaise for an aioli to put on sandwiches and wraps!

Air Fryer Roasted Garlic FAQs
Can I make roasted garlic in the air fryer without foil?
Yes, you can roast garlic in the air fryer without foil, but the cloves won’t steam the same way. If I don’t have foil, I’ll wrap the garlic heads in parchment paper and tie with baker’s twine or place the garlic bulb in an air-fryer-safe baking dish and pour oil over top.
How to store leftover air fryer roasted garlic
I submerge my leftover roasted garlic cloves in oil in a glass jar with a screw top or other airtight container and store in the refrigerator for up to a week. If I roast several heads at once, I like freezing the extra cloves in an ice cube tray submerged in olive oil. That way, I always have some ready to go in the freezer!

More Easy Air Fryer Recipes
- Air fryer sweet potato fries
- Air fryer vegetables
- Air fryer blooming onion
- Air fryer baked potato
- Air fryer acorn squash
Love air frying? Join my newsletter! You can also follow me on Facebook, Instagram, or join my free Facebook Air Frying Community.
Easy Air Fryer Roasted Garlic
Equipment
Ingredients
- 3 full bulbs of garlic
- 1-2 tablespoons olive oil
- 1 teaspoon salt
Instructions
- Preheat the air fryer to 400 degrees F.
- Carefully slice the tops off the garlic bulbs so the cloves inside should are exposed.
- Drizzle the olive oil over the top of each garlic bulb, making sure all the cloves get covered.
- Sprinkle salt on each bulb and tightly wrap each of them in tin foil.
- Place them in the air fryer and cook for 18-20 minutes, or until the garlic is tender.
- Allow them to cool until you can handle them and remove the bulbs from the papery skin.
Notes
- Look for firm heads of garlic with tight, papery skin and no green sprouts.
- Slice off just enough of the top of the garlic head to expose each clove and try to make the cut as straight as possible.
- For the best taste, use a good quality extra virgin olive oil so the flavor can really shine through.
- Each head of garlic should be wrapped tightly in foil so the garlic steams while it roasts. This is what makes the garlic cloves soft and tender.
- Use the garlic spread on garlic bread, in mashed potatoes, salmon, vegetables, in sandwiches, wraps, and more!
- Store leftovers in a tightly closed glass jar submerged in oil for up to a week.
Nutrition
This nutrition information is based on the exact products I used in this recipe. Brands and sizes of products could alter exact nutrition and should always be calculated independently.
Like this? Leave a comment below!