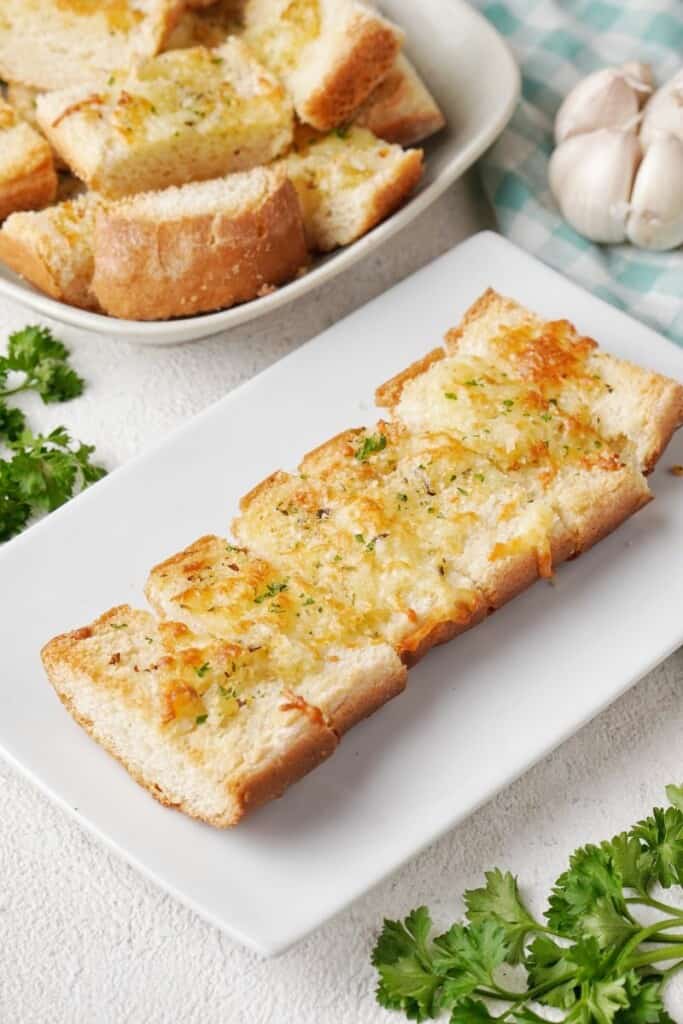
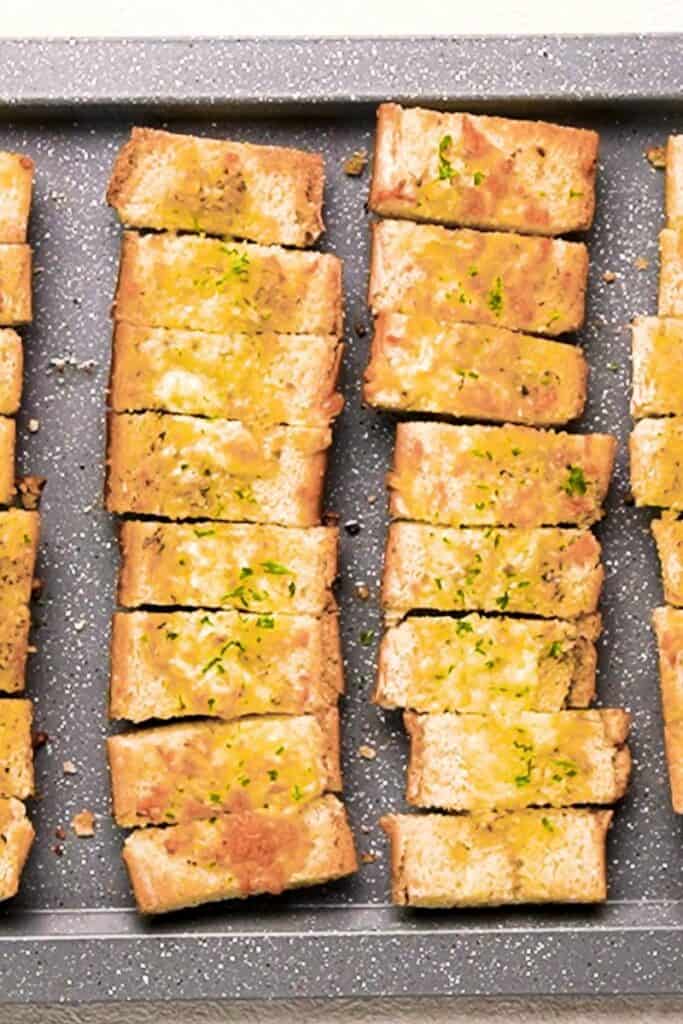
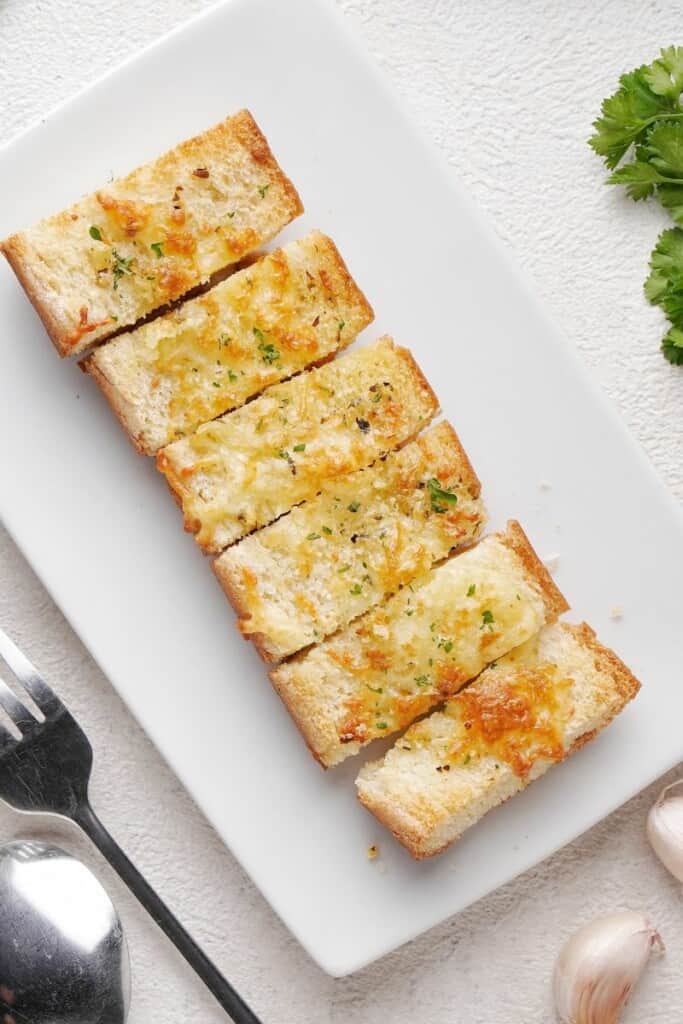
Garlic Cheese Bread
This post may contain affiliate links, read my disclaimer.
My garlic cheese bread is made out of fresh bread, garlic, and cheese. It’s super easy to make, and my whole family prefers it to the frozen brands.
My Family Loved Cheesy Garlic Bread
I have never been able to resist a good garlic cheese. I mean it’s bread, garlic, and cheese. What is not to love?!
While I’ve always enjoyed it at restaurants, I wanted to find an easy way to put it together at home so I can indulge in it any time I wanted. My recipe uses a special mix of oil and herbs to get that perfect flavor while getting crispy and staying easy to make.
My daughter Leah eats up the cheesy garlic bread as soon as she sees it on her plate and immediately scours the table for extras. And, if she’s doing that, I know it’s whole family approved.
For more side dish recipes, check out my roasted asparagus, twice-baked potatoes, jalapeno poppers, caramelized brussels sprouts, and easy potato soup!
Cheesy Garlic Bread Recipe Ingredients
- Loaf of Italian or French bread – This gives the bread enough structure to hold the toppings without getting soggy.
- Olive oil – This makes up part of the base to brush over the top of the bread.
- Unsalted butter – Butter adds richness to the base of the oil and herb mixture and balances the sharp garlic flavor.
- Minced garlic – Fresh garlic cloves give the bread its signature bite! I always prefer fresh garlic to minced or garlic powder for this recipe.
- Italian seasoning – This adds herby flavor in a convenient blend so I don’t have to measure out a bunch of individual seasonings.
- Red pepper flakes – I use these sparingly for a little heat.
- Shredded mozzarella cheese – Mozzarella melts smoothly and gives me that beautiful cheese pull.
- Fresh parsley – Optional, but I like how the herb adds a pop of color and freshness.
- Freshly grated Parmesan – Optional, but I love sprinkling on some Parmesan to give the garlic cheese bread salty, savory depth.
How to Make Garlic Cheese Bread
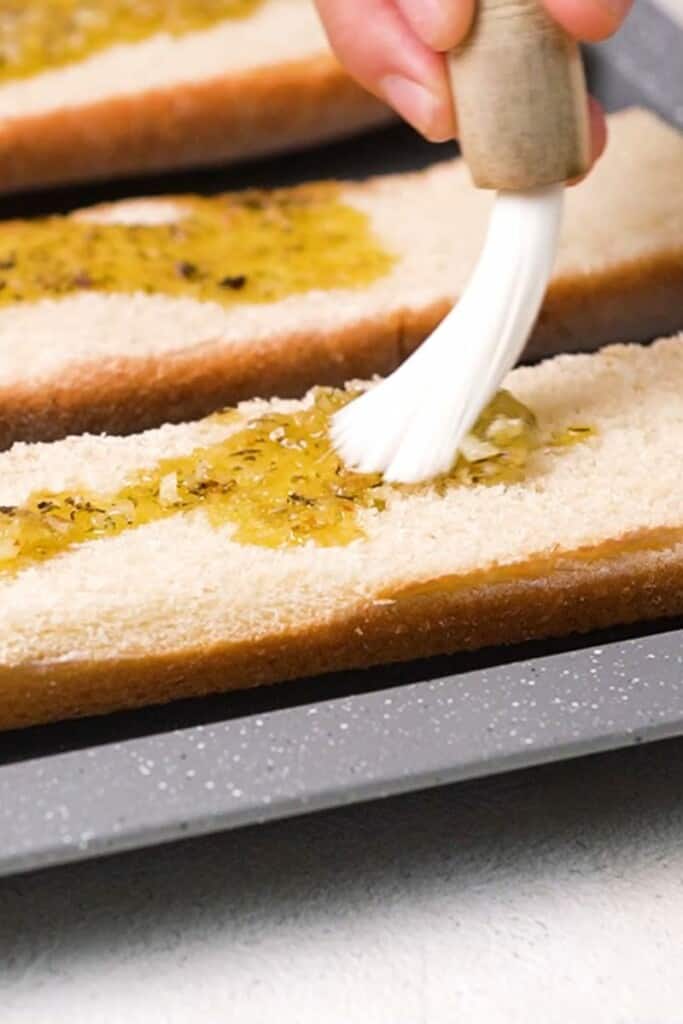
STEP ONE: Preheat the oven to 425 degrees F. Meanwhile, cut the bread in half lengthwise and press down on the middle, opening it up. Place it on a baking sheet.
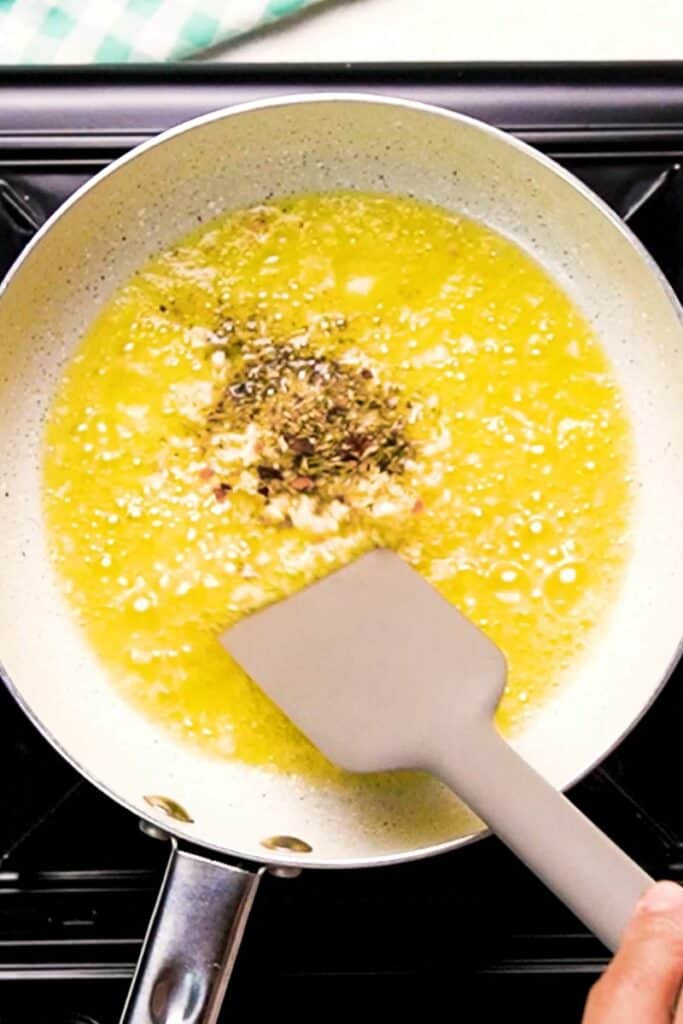
STEP TWO: Add the olive oil and butter to a pan on medium-low heat. Once the butter melts, add the minced garlic, Italian seasoning, and red pepper flakes. Saute it for 2-3 minutes until garlic becomes fragrant.
STEP THREE: Brush the garlic butter sauce on top of the bread and follow with a sprinkling of the shredded cheese. Grate fresh Parmesan cheese on top if desired.
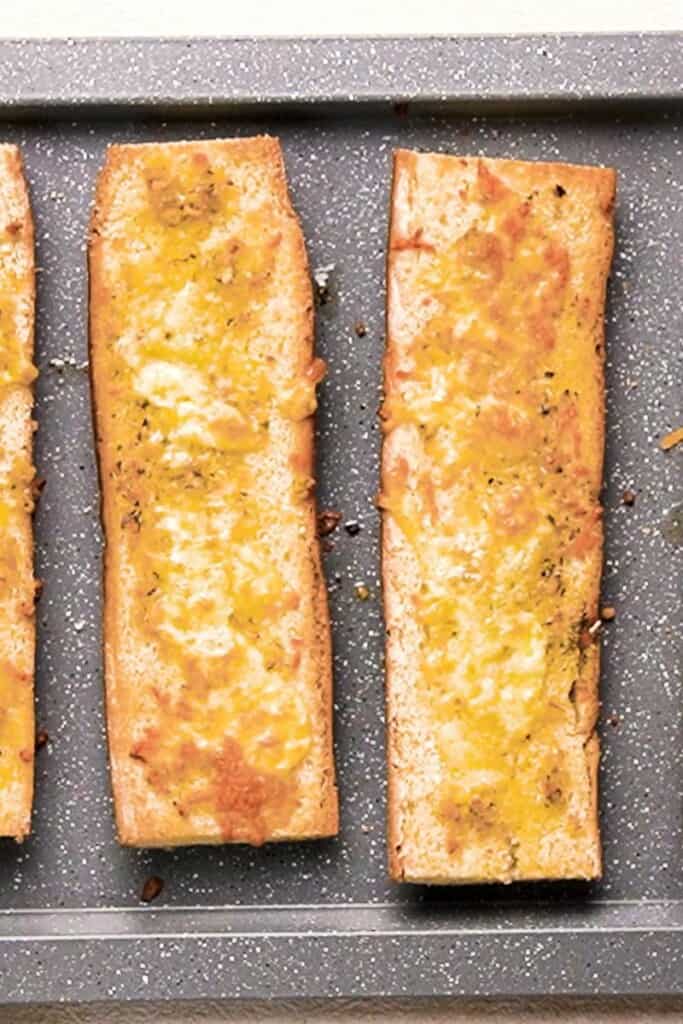
STEP FOUR: Slide the sheet into the oven and bake it for around 10 minutes until the edges are golden brown.
STEP FIVE: Remove it from the oven and garnish with fresh parsley. Slice and serve immediately while hot.
Recipe Tips
- To get ahead of dinner, I’ll prep the butter, oil, and herb spread up to three days early and keep it in the fridge until I’m ready to use it.
- For a shortcut version, I sometimes use a simple store-bought white pizza sauce instead of the homemade garlic butter. This is my favorite one.
- When I want deeper flavor, I use my air fryer roasted garlic in place of fresh garlic.
- I sometimes like to use fresh herbs like thyme or oregano and stir them directly into the butter mixture.
- For extra creaminess, mayo works surprisingly well in place of butter and oil!
- If I want the cheese extra golden and bubbly, I’ll turn on the broiler for the last 1-2 minutes of baking.
What do I eat with cheesy garlic bread?
My cheesy garlic bread is absolutely perfect to serve alongside pasta dishes like baked penne pasta, rigatoni bolognese, or marry me chicken pasta!
If I want some greens on the side, I usually throw together a chicken caesar salad, chopped salad, or classic caprese salad.
Garlic Cheese Bread FAQs
What is the best bread to use?
I often go for Italian bread because it’s soft, fluffy, and wide, but French bread is another great option because of its chewy, thick crust. I’ve also experimented with a baguette and even sourdough, and both turned out delicious!
What is the best cheese?
Mozzarella is my default cheese because it melts evenly and gives me the best cheese pull. But I’ve also tried other cheeses like cheddar, Colby Jack, Monterey Jack, and an Italian cheese blend, and all of them turned out amazing! I also always add Parmesan on top.
How do I avoid soggy garlic cheesy bread?
I use a mix of olive oil and butter, which is better than using butter alone for spreading over the bread without it getting too greasy or soggy. I also try to baste the garlic bread evenly so there aren’t any soggy patches.
How do I store leftovers?
I let the bread cool completely to avoid trapped condensation that could make my garlic cheese bread soggy, then store leftovers in an airtight container in the fridge. It keeps well for up to 3 days.
How do I reheat leftovers?
I like to reheat my leftover cheesy garlic bread in the air fryer! I preheat to 330 degrees F, then air fry for 2-3 minutes.
The oven also works well, it’s just a little slower. I preheat to 350 degrees F, wrap the cheese garlic bread in aluminum foil, and bake for 10-15 minutes.
More Easy Garlic Recipes
- Garlic butter steak bites
- Garlic parmesan chicken pasta
- Air fryer garlic bread
- Garlic parmesan sauce
- Garlic green beans

Easy Garlic Cheese Bread
Ingredients
- 1 loaf of French Bread, or Italian loaf
- 3 tablespoons olive oil
- 3 tablespoons unsalted butter
- 4 cloves garlic, minced
- 1 teaspoon Italian seasoning
- Small pinch of red pepper flakes
- 1/2 cup shredded mozzarella cheese
- Parsley, optional
- Freshly grated Parmesan, optional
Instructions
- Preheat the oven to 425 degrees F and cut the bread in half lengthwise.
- Heat the olive oil and butter in a pan on low/medium heat until the butter has melted.
- Add the garlic, Italian seasoning, and red pepper flakes to the pan and cook them for 2-3 minutes until garlic is fragrant. Stir frequently, so the garlic does not brown or burn.
- Push down the middle of the bread on both sides and place on a baking sheet.
- Baste oil and herb mixture on top of the bread and spread shredded cheese evenly over top. Add the Parmesan if using.
- Cook it in the oven for 9 to 11 minutes, until the edges start to turn golden brown.
- Top with parsley if desired then cut and serve!
Notes
- The butter herb mixture can be prepped up to 3 days in advance. Just keep it in the fridge until you’re ready to use it!
- For a shortcut version, use a simple store-bought white pizza sauce instead of the homemade garlic butter.
- For extra creaminess, mayo works surprisingly well in place of butter and oil!
- To get the cheese extra golden and bubbly, turn on the broiler for the last 1-2 minutes of baking.
Nutrition
This nutrition information is based on the exact products I used in this recipe. Brands and sizes of products could alter exact nutrition and should always be calculated independently.
Like this? Leave a comment below!


I appreciate these recipes. They will be used often.