Hot Dog Burnt Ends (No Smoker!)
This post may contain affiliate links, read my disclaimer.
My hot dog burnt ends are sweet, smoky, and caramelized in 40 minutes on the grill! It’s just 6 ingredients and no smoker required.
If you’d rather skip the grill, my air fryer hot dogs are a quick and easy indoor version when it’s cold or raining outside. And, if you want a saucy hot dog without slicing them up first, my BBQ hot dogs are the bun-in-hand version of basically the same flavor.
My No-Smoker Trick for Real BBQ Flavor

My grilled hot dog burnt ends are the no-smoker version of one of the most fun appetizers I make for parties. They’re sticky, saucy, and caramelized at the edges.
The trick that makes this work without a smoker is the smoked paprika in the rub. It carries the smoky flavor you’d normally get from sitting hot dogs over actual wood smoke. So I get the flavor without the hour-long wait and without owning a smoker I don’t have room for.
My son Connor calls these “the ones with the magic sauce.” He says burnt end hot dogs are more fun than regular hot dogs because they’re bite-sized. He’s my taste tester every time I make them, and so far the magic sauce hasn’t lost its title!
Table of Contents
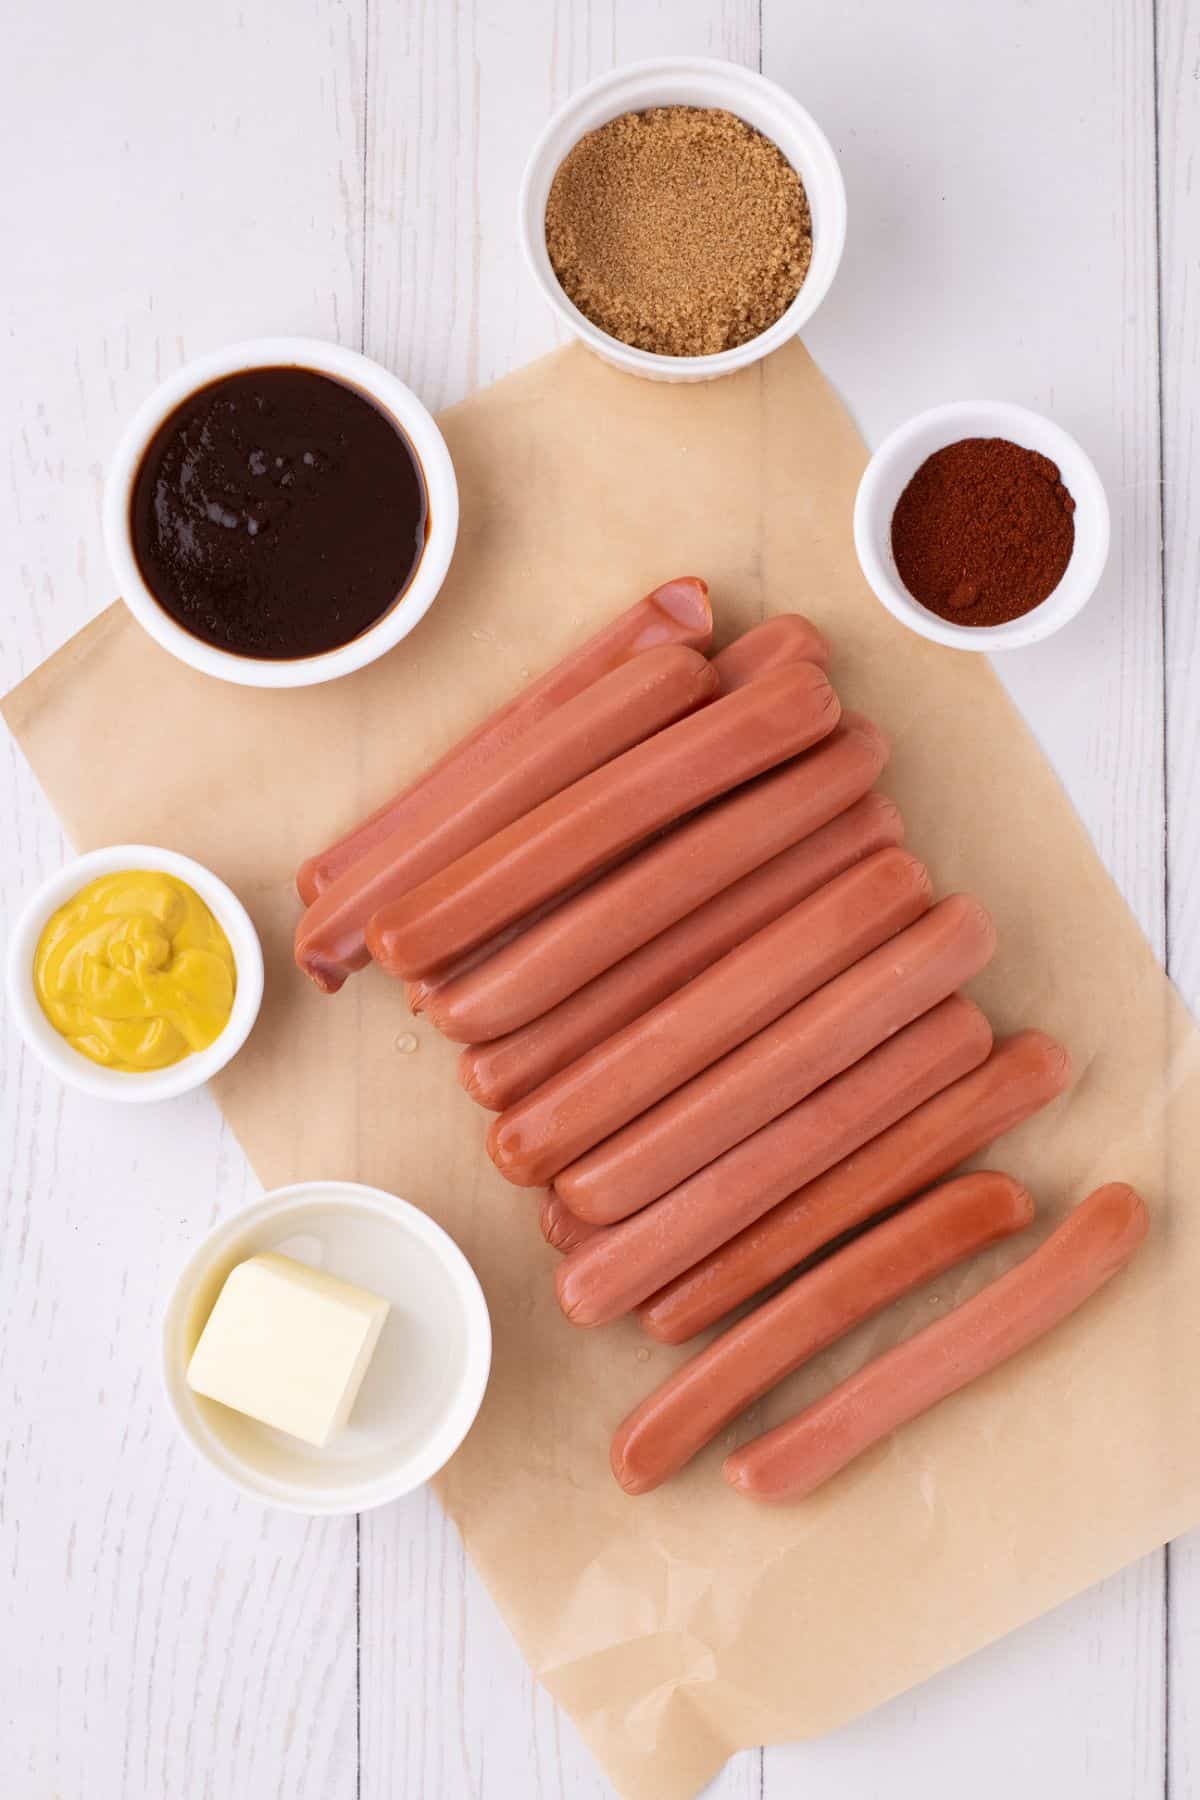
Here’s something fun. It’s literally just 6 ingredients cooked in a tinfoil dish on the grill! It’s yellow mustard, smoked paprika, butter, brown sugar, BBQ sauce, plus the hot dogs themselves. I don’t use a specialty rub or specialty sauce. I just use ingredients easily found in my house!
The hot dog burnt ends take 40 minutes start to finish, which is the part I love most. I’ve seen the smoker versions online and they take 90 minutes plus. I’m not setting up a smoker and waiting more than an hour for hot dogs. The grill version gets you to the same flavor and the same caramelized edges in less than half the time.
Burnt Hot Dog Ingredients
- Hot Dogs – All-beef hot dogs are my favorite because they’re nice and firm, and extra savory! I use 16 hot dogs total for this recipe. Pork or chicken hot dogs work fine too, and you can swap in sausages or hot links if you want a meatier version.
- Prepared yellow mustard – This tangy, savory ingredient helps the seasoning stick to the meat.
- Smoked paprika – Infuses earthy, slightly sweet notes and a touch of smokiness.
- Butter – Unsalted butter is my go-to since the hot dogs are already packed with plenty of sodium. This is the key ingredient that helps thicken the sauce.
- Brown sugar – Adds the perfect amount of sweetness to cut through the smoke flavor. It also allows the hot dogs to caramelize on the grill. Swap half for maple syrup or honey if you want a glossier, less sticky sauce.
- BBQ sauce – Ties the whole thing together with its bold, tangy flavor. I reach for a classic, sweet store-bought sauce for cooking, plus more for dipping!
How to Make Hot Dog Burnt Ends
A full printable version of this recipe with ingredient measurements is available at the bottom of this post.
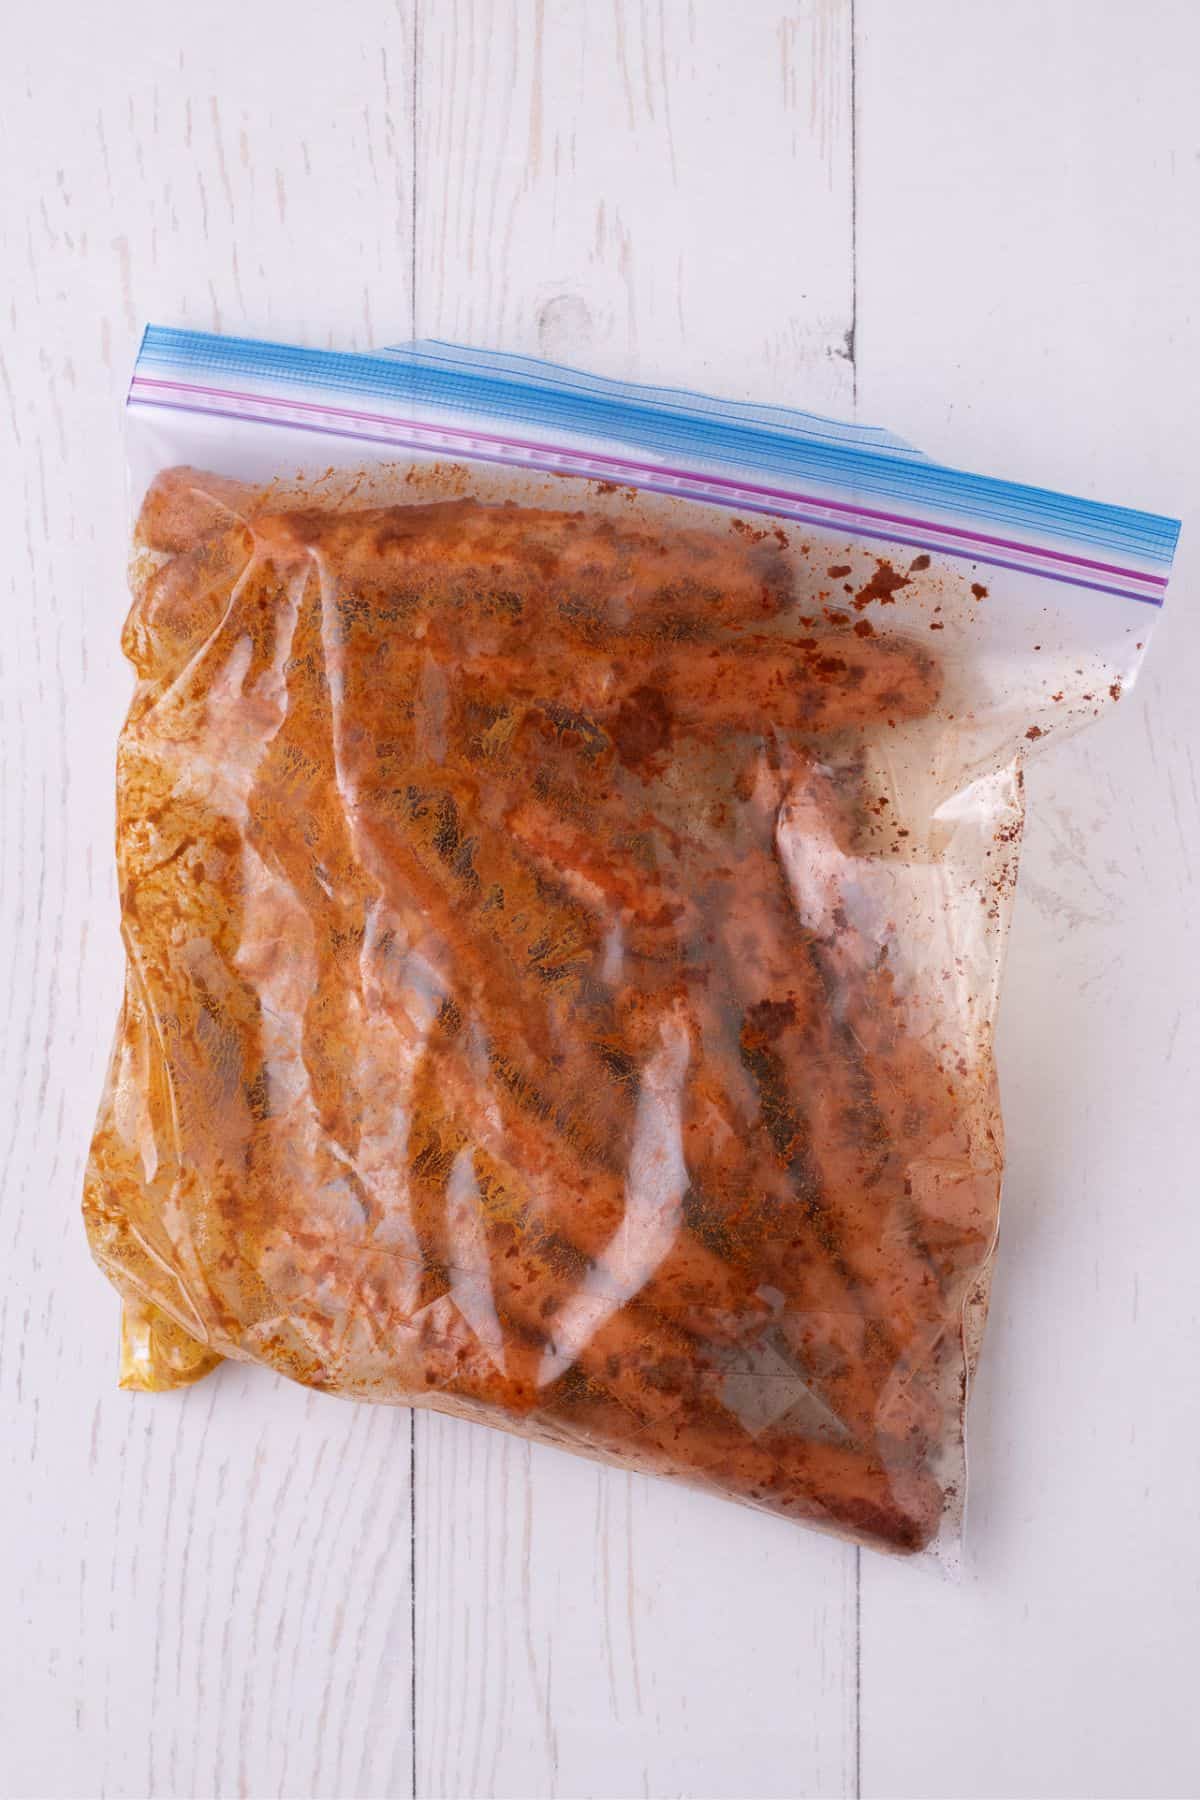
STEP ONE: In a large, zippered freezer bag, add the mustard, hot dogs, and smoked paprika. Seal the bag and massage until evenly coated.
STEP TWO: Next, set the grill burners to medium-low heat and lightly grease the grates with oil.
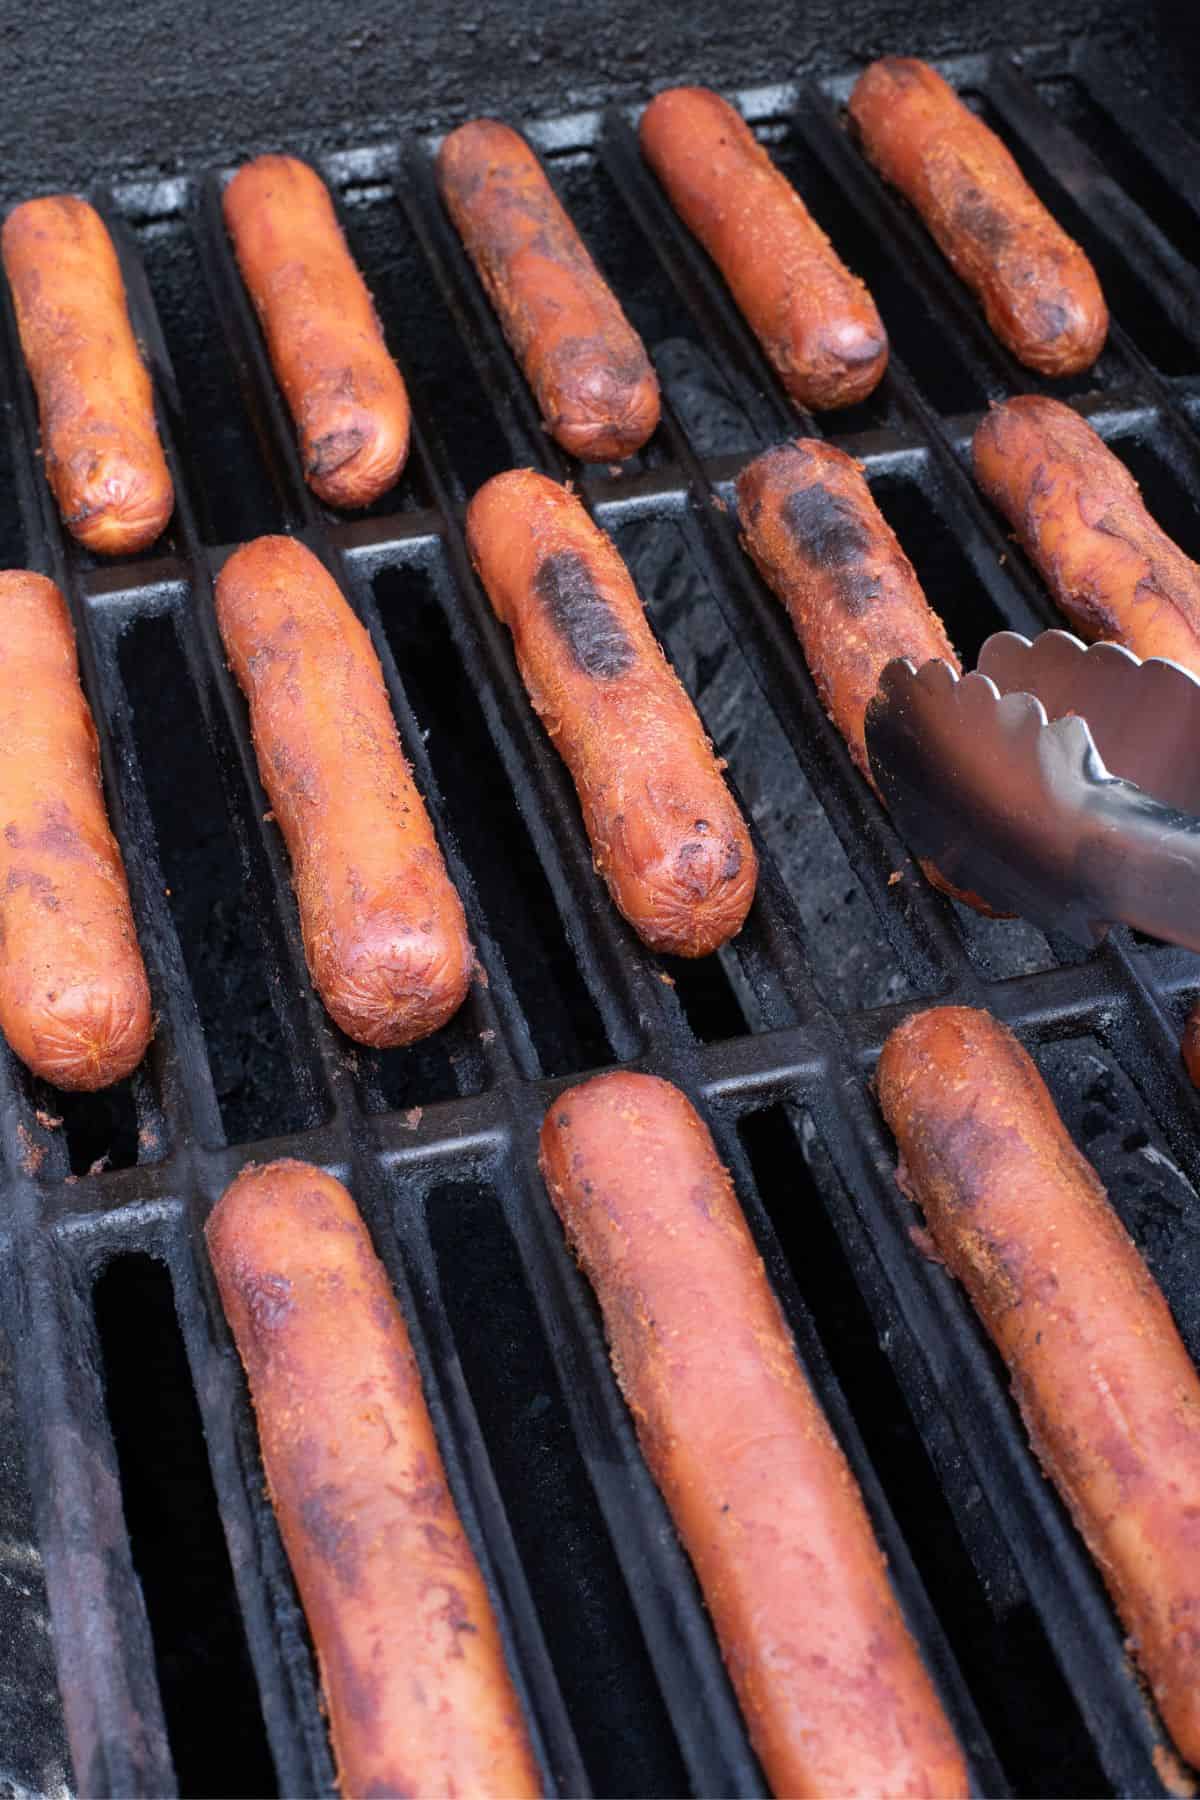
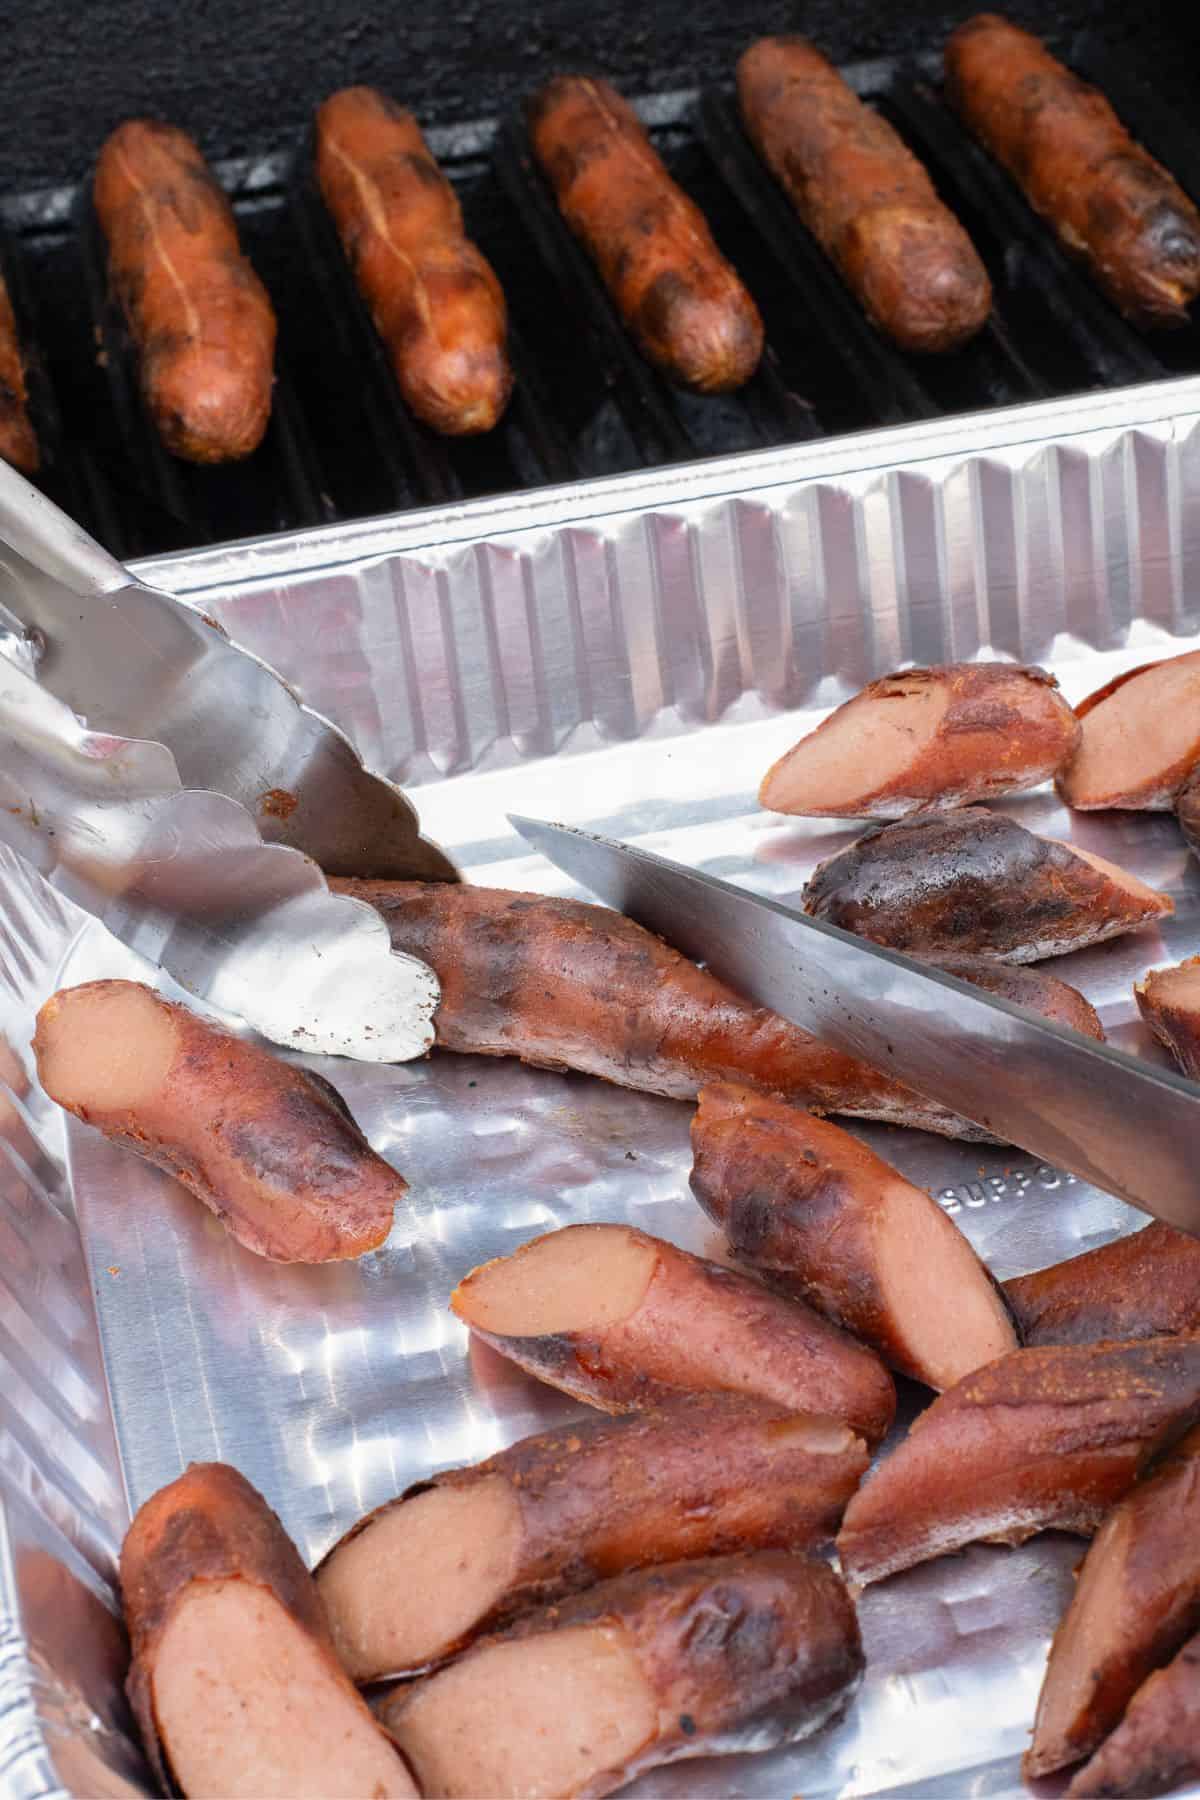
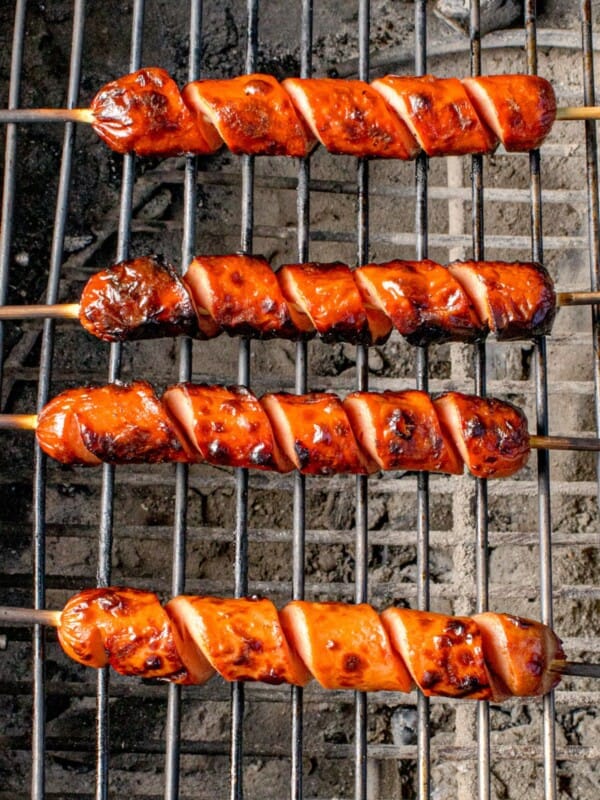
STEP THREE: Place the hot dogs on the grill with some space between each one, then cook over medium-low heat with the lid open for about 20 minutes, turning frequently.
STEP FOUR: Increase the heat to medium as the hot dogs cook, and continue rotating them to ensure even browning.
STEP FIVE: Once the hot dogs are dark brown, transfer them to a disposable aluminum baking tray and cut them diagonally into thirds.
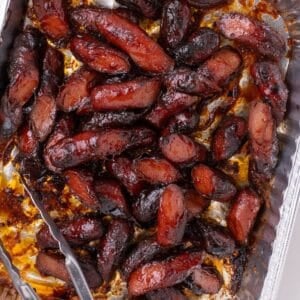
STEP SIX: Place the tray on the grill grates. Add the butter, brown sugar, and barbecue sauce, then stir until the butter is melted and the hot dogs are evenly coated.

STEP SEVEN: Close the lid and bring the grill to 350 degrees F. Cook for 3 to 5 minutes, stirring halfway through.
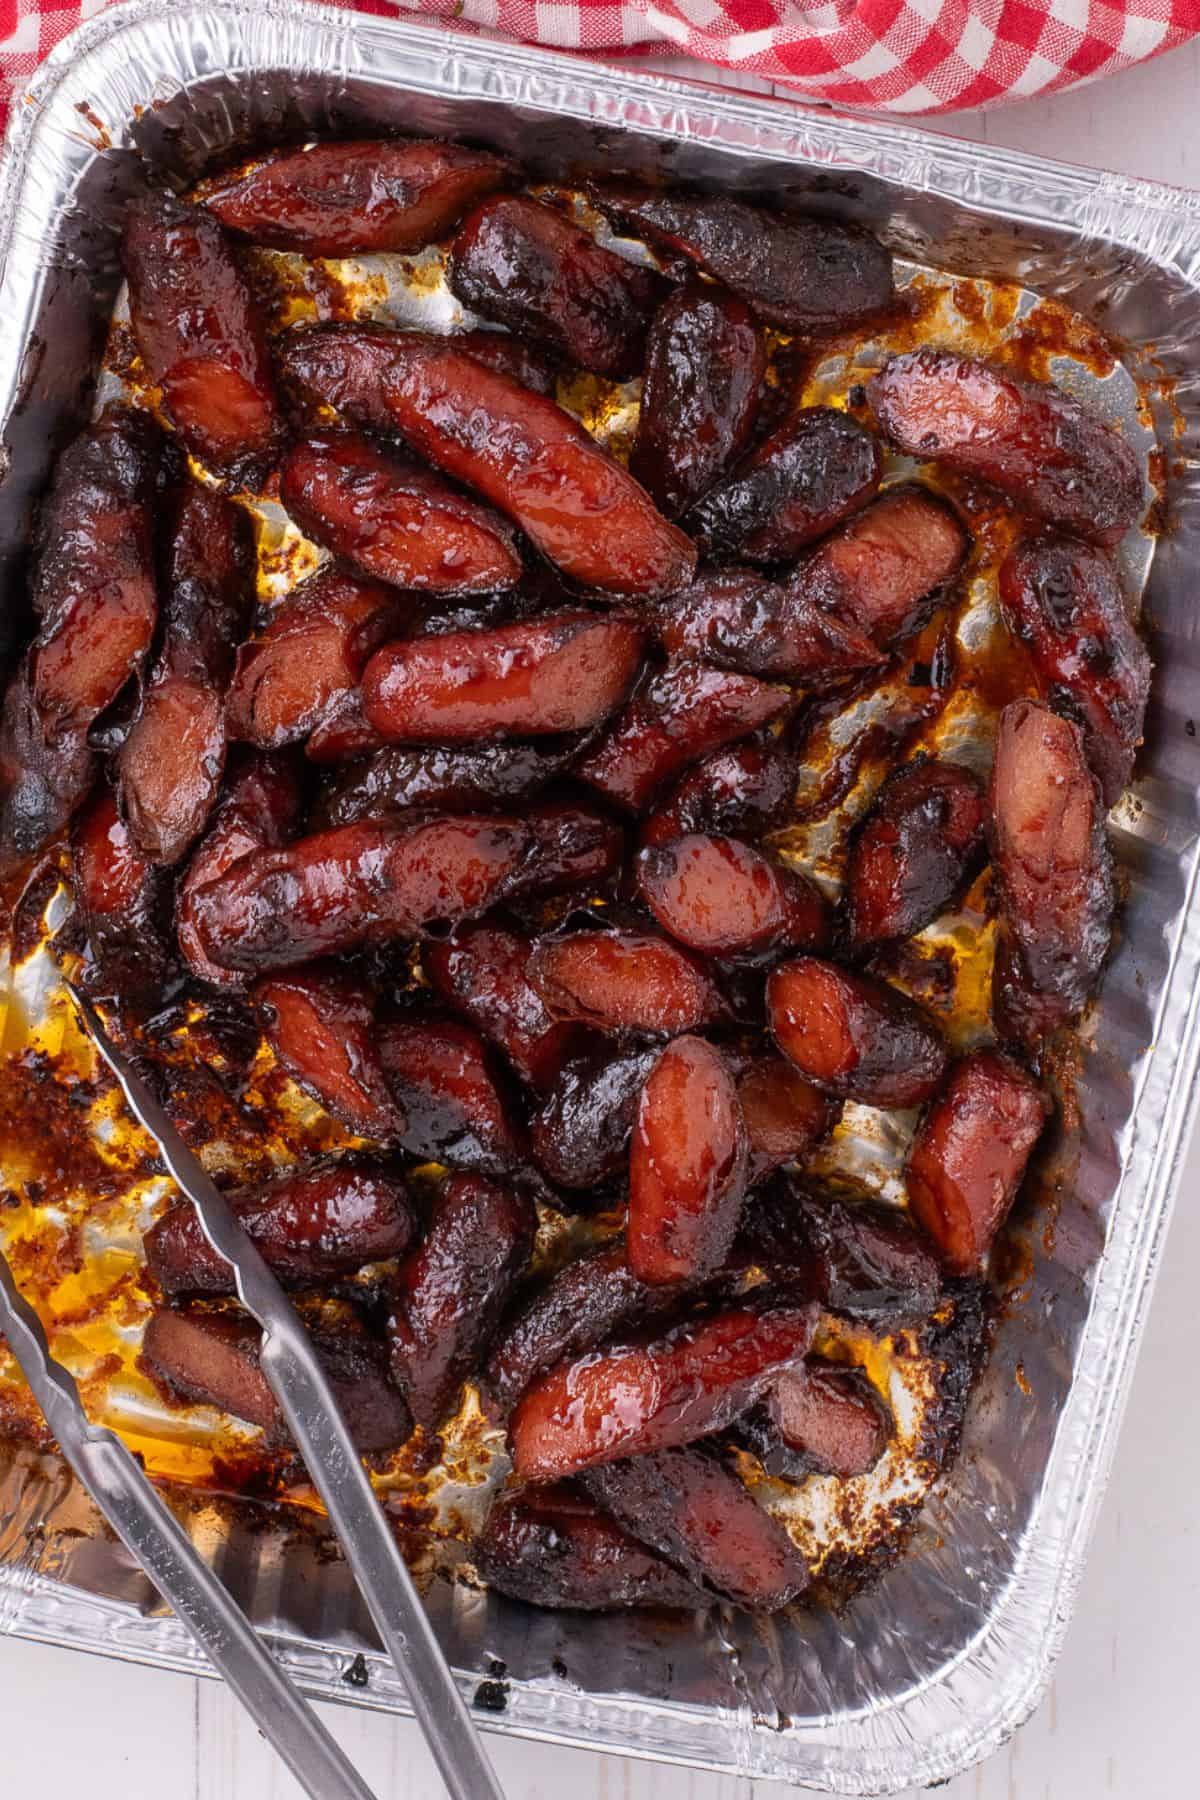
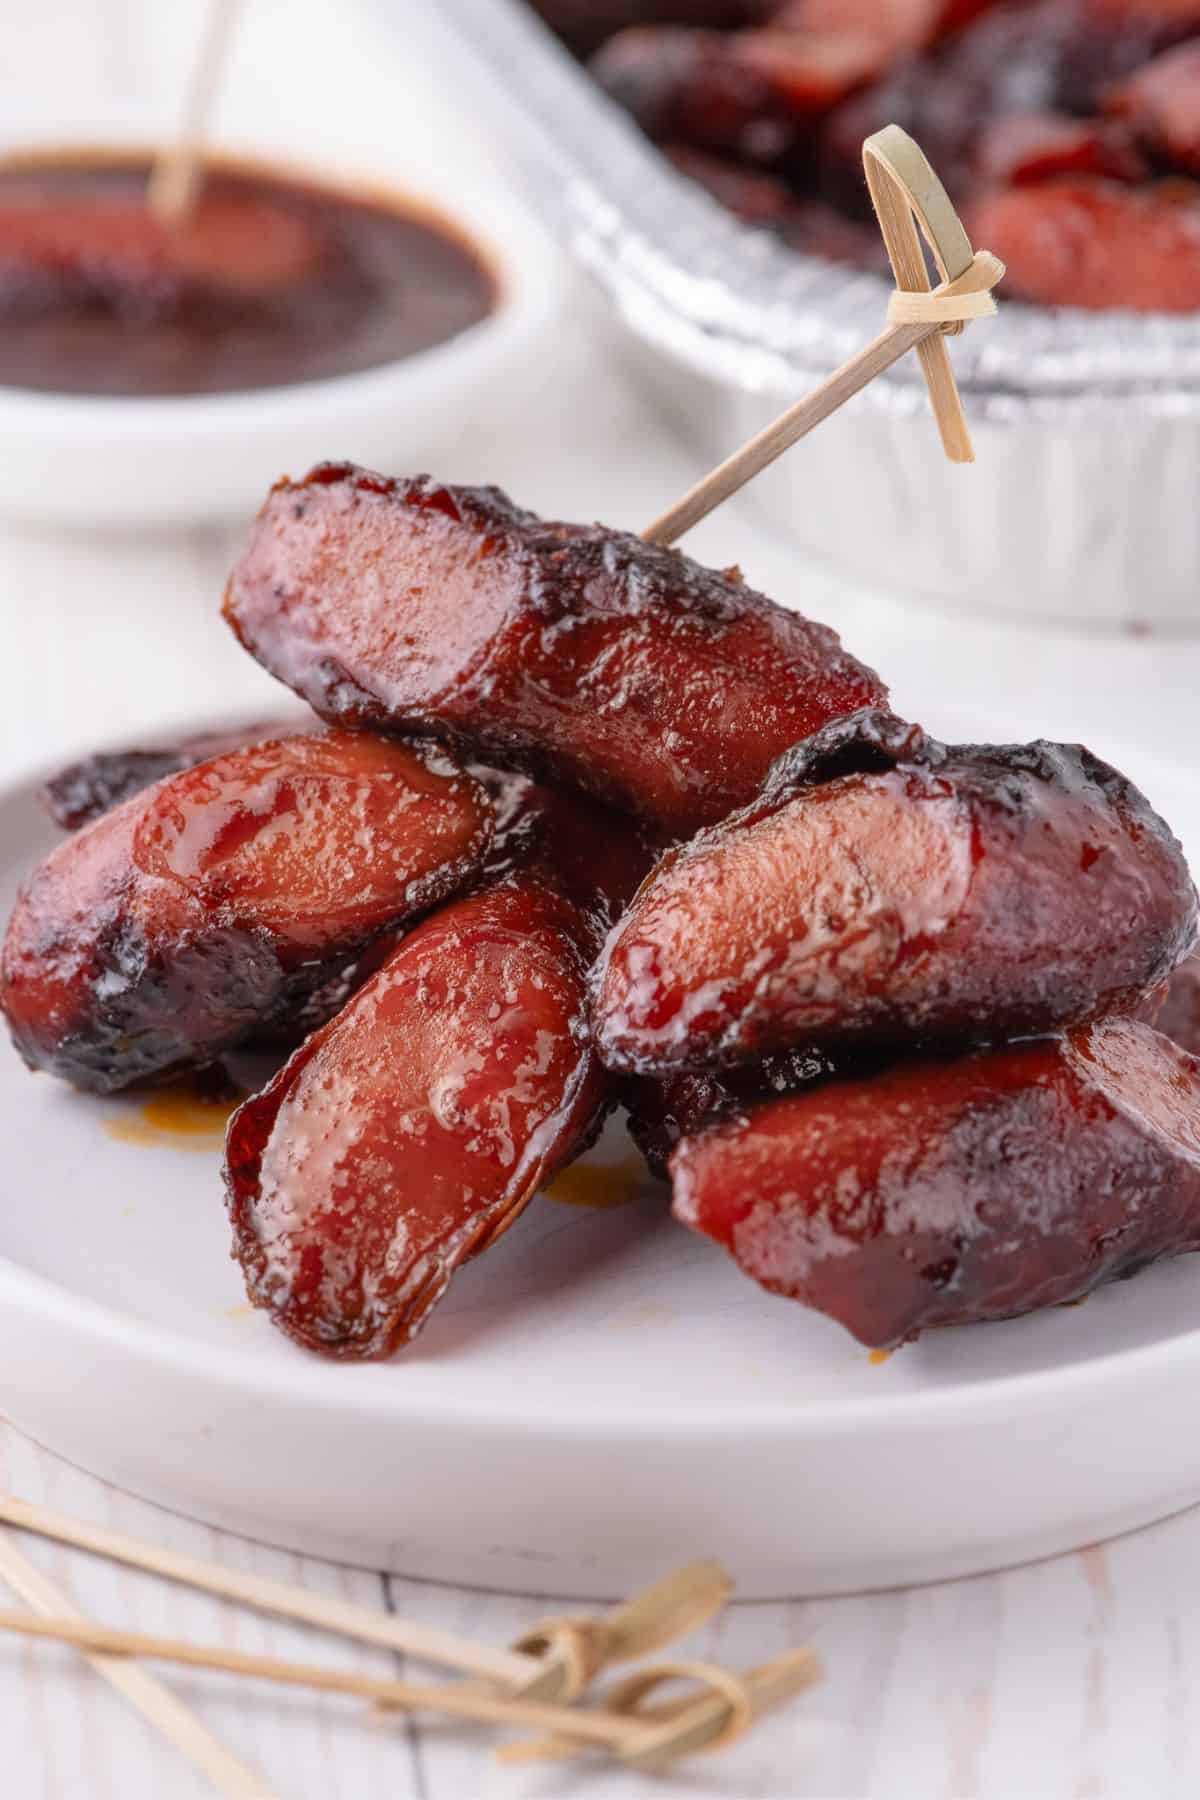
STEP EIGHT: Remove the hot dog ends from the grill once the sauce is thickened and caramelized. Serve hot with extra BBQ sauce and enjoy!
Recipe Tips
- Use smoked paprika, not regular. I know I already said it but it really does make a huge difference. Regular paprika is mostly color. Smoked paprika is what makes these taste like they spent an hour on a smoker when they didn’t.
- Start on low heat and finish higher. Medium-low at the start keeps the hot dogs from splitting their skins. Then I bump the heat up at the end to add some char. I’ve started them hot from the beginning and the hot dogs blister and bust instead.
- Cut the hot dogs diagonally. Diagonal slices give more surface area for the sauce to grab onto. Round-cut pieces look the same after grilling, just with less crispy edge. Diagonal cuts make the “burnt ends” look more like real burnt ends.
- Use toothpicks for serving. I stick a toothpick in every hot dog before serving. This makes them the perfect grab-and-go snack without any mess. And, for some reason, my kids love food more when there’s toothpicks involved.
Variations
- Make it spicy. A pinch of cayenne in the rub or a swap to spicy BBQ sauce gives them a kick. Connor doesn’t love this version, but Ben will eat them all.
- Build a slider tray. I love doing this for lunch the next day if I have leftovers. Just pile a few burnt ends on a slider bun with a pickle! I use the same idea in my BBQ chicken sliders.
- Top with hot dog chili. Spoon my hot dog chili over the burnt ends for a chili-cheese version for cookouts.
What to Serve with Burnt End Hot Dogs
I love serving these smoky hot dogs with sides like my baked beans using pork and beans. They match the brown sugar caramelization in the sauce, so the whole plate is filled with flavor. I also also love a full spread of classic BBQ sides like my simple macaroni salad recipe, pineapple coleslaw, and loaded potato salad.

Hot Dog Burnt Ends FAQs
Absolutely! This hot dog burnt ends recipe is easy to prepare in advance and enjoy later, so it’s great for parties or events. I recommend browning the hot dogs ahead of time but waiting to toss them in the sweet barbecue sauce until just before serving. They’ll taste best freshly coated!
Leftover hot dog ends can be refrigerated for up to 5 days. I store them in an airtight container to keep them fresh.
I like to reheat my leftovers in the microwave for a quick fix. I also add a little extra BBQ sauce when reheating, plus more once they’re warmed through.
Yes, the oven broiler works great instead of a grill. Broil the hot dogs for about 10 minutes turning often, then transfer to a baking dish, toss with the sauce, and broil another 3 to 5 minutes until the edges are caramelized.
More Recipes for the Grill
- Grilled hot dogs
- How to grill chicken wings
- London broil on the grill
- How long to grill chicken legs
- How to grill pork chops
- Grilled chicken tenders recipe
- Grilled steak recipe
If you’ve made these hot dog burnt ends, I would love to know what you think! Leaving a comment and rating helps others find this recipe too. Thank you!
Hot Dog Burnt Ends (No Smoker!)
Equipment
- gas or charcoal grill
Ingredients
- 16 hot dogs
- 2 tablespoons yellow mustard
- 1 tablespoon smoked paprika
- ¼ cup butter, unsalted
- ¼ cup brown sugar, packed
- ¼ cup barbecue sauce, plus more for dipping
Instructions
- Place the hot dogs, mustard, and smoked paprika in a large Ziploc bag. Seal the bag and massage until the hot dogs are evenly coated.
- Set the grill to medium-low heat (about 300F).
- Place the hot dogs on the grill and cook with the lid open for about 20 minutes, turning them frequently.
- Increase the heat to medium (about 325F) and continue cooking, rotating the hot dogs to ensure even browning.
- Once the hot dogs are dark brown, transfer them to a disposable aluminum baking tray and cut them diagonally into thirds.
- Place the tray on the grill. Add the butter, brown sugar, and BBQ sauce. Allow the butter to melt, then stir until the hot dogs are evenly coated.
- Close the lid and bring the grill to 350F. Cook for 3-5 minutes, stirring halfway through.
- Remove the hot dog ends from the grill once the sauce is thickened and caramelized. Serve hot with extra BBQ sauce!
Notes
Nutrition
This nutrition information is based on the exact products I used in this recipe. Brands and sizes of products could alter exact nutrition and should always be calculated independently.
Like this? Leave a comment below!


If i don’t have a gas or charcoal grill, could this be made in a mini george forman grill or frying pan?
Hi Alex, I’ve included some oven directions in the post! I love to use the broil feature to get things to cook faster than the traditional oven that way, so just pay close attention to the hot dogs since they can burn quickly.