No Spread Sugar Cookies
This post may contain affiliate links, read my disclaimer.
Looking for the perfect no spread sugar cookie recipe? You’ve found it! Filled with butter, vanilla, and (of course) sugar, they hold their shape and can be decorated however you’d like!
Whenever I’m stuck on an activity to do with my kids, the baking supplies come out! They adore helping me out in the kitchen, and a good cookie recipe can occupy us for hours.
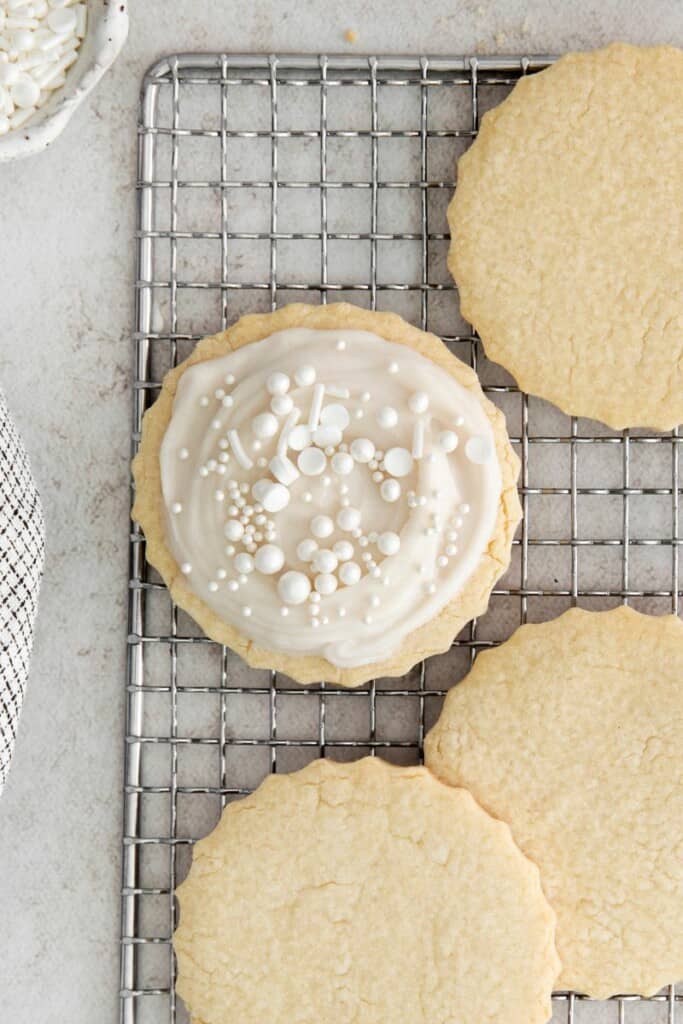
The fun part starts when the cookies come out of the oven and it’s time to decorate. No spread sugar cookies are some of our favorites, as they leave a lot of room for creativity.
Today’s recipe is for the best no spread sugar cookies around. No spread means that the edges crisp up really nicely, which makes it easier to add frosting, sprinkles, and more.
You can also use a cookie cutter to create no spread cutout cookies.
Bake up a batch for holidays, birthdays, or simply as a fun after-school snack to have around the house.
And if you love snacking on your sugar cookie dough, you will love our edible sugar cookie dough that’s meant just to be eaten raw!
Here’s what I’m going to teach you in this post:
- How to create the best no spread sugar cookies at home, plus the minimal pantry ingredients you’ll need to make them.
- Fun variations so that you can make this no spread sugar cookie recipe your own.
- The secret to creating no spread cutout cookies — it’s all about what you bake your cookies on!
Whether you’re looking for a fun activity to do with your kids, or simply want to bake up a batch of the best no spread sugar cookies ever, this recipe is for you.
How to Make No Spread Sugar Cookies
A full printable version of this recipe with ingredient measurements is available at the bottom of this post.
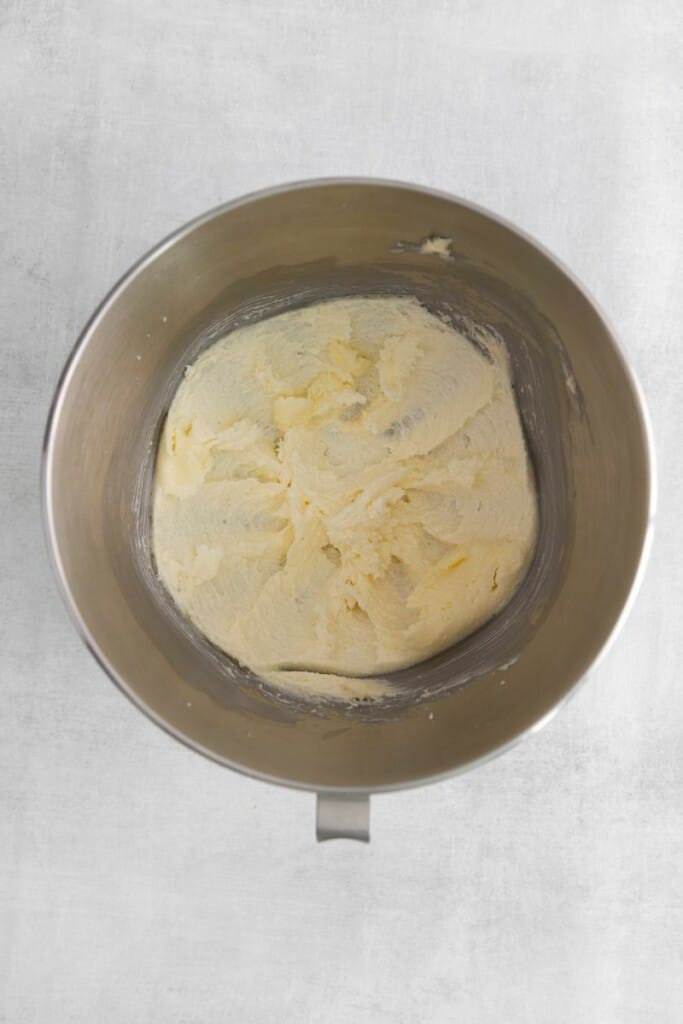
STEP ONE: Place the softened butter and granulated sugar into the bowl of a stand mixer fitted with a paddle attachment. Mix on medium speed until the mixture becomes light and fluffy, or at least 2 minutes — it’s important to use a mixer as it will give you soft cookies every time!
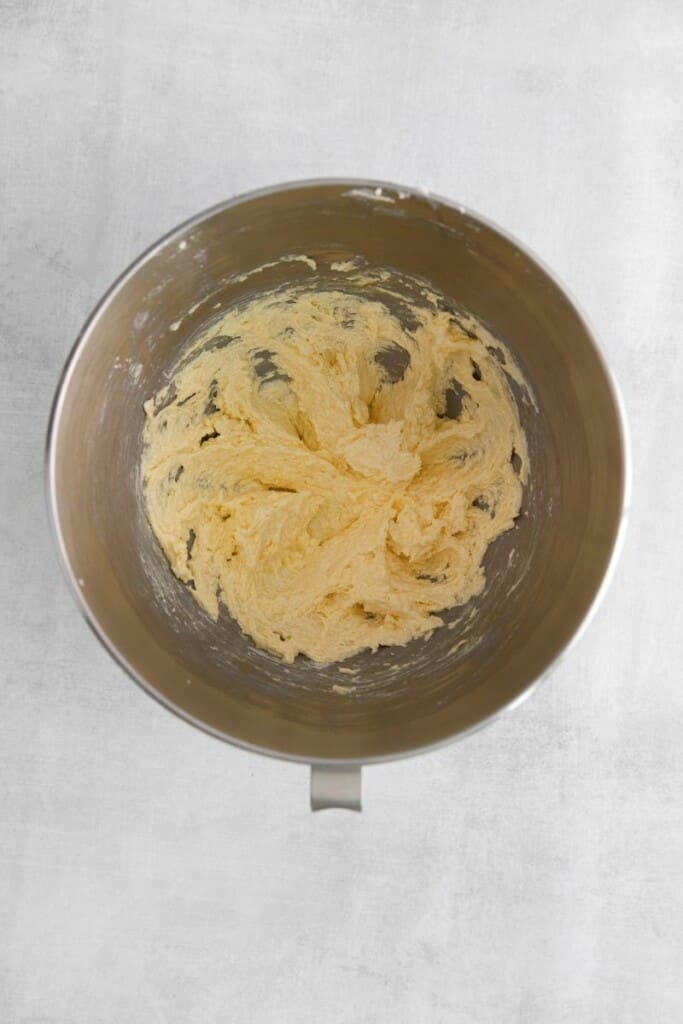
STEP TWO: Add the egg and vanilla to the bowl and mix to combine. Scrape the edges of the bowl to ensure that all of the butter has been incorporated. Add the flour next and mix until just combined — don’t overmix, or they’ll end up tough.
STEP THREE: Shape the dough into a 1-inch thick disc, then place it in the fridge to chill for at least an hour, or overnight. After it’s chilled, unwrap the dough and place it on a lightly floured surface. Roll it out so that it is ¼-inch thick. If you find that the dough starts to tear, allow it to sit at room temperature for a few minutes. You may need to let dough that has been chilled overnight sit for up to 30 minutes.
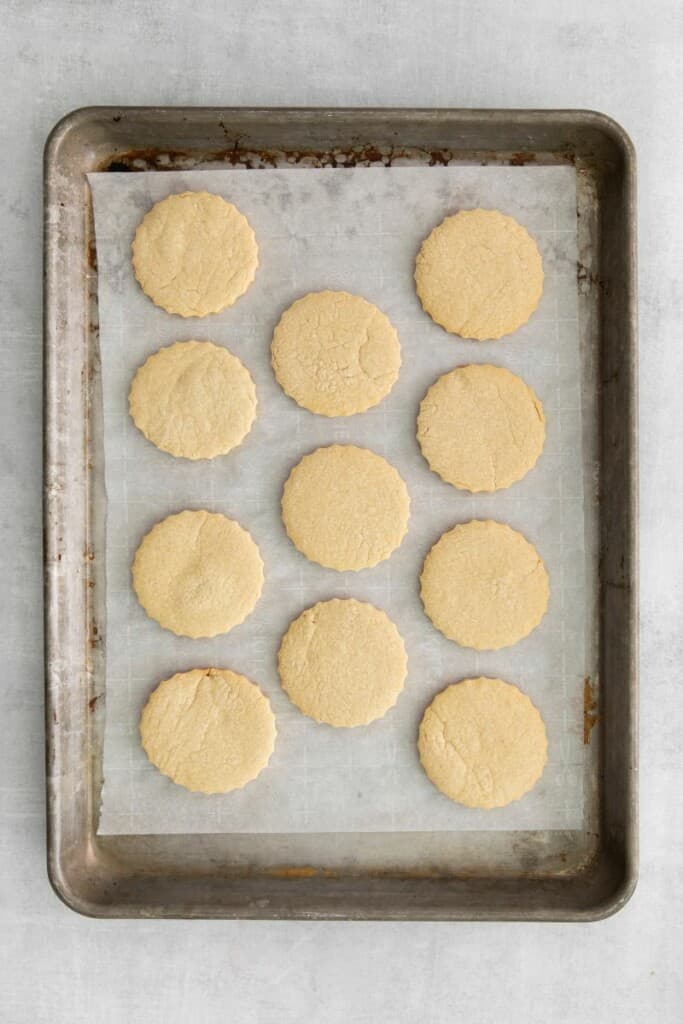
STEP FOUR: Cut the dough into your desired cookie shape and place the cookies on a parchment-lined baking sheet. Allow the shapes to chill in the freezer for 30 minutes. While you wait, preheat your oven to 350 degrees F.

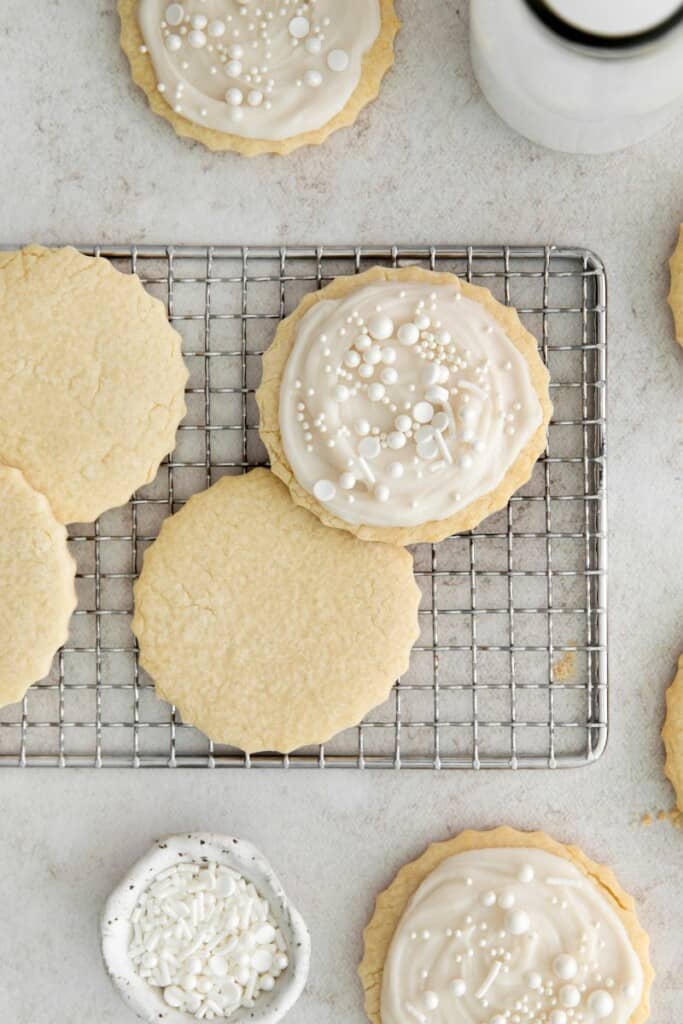
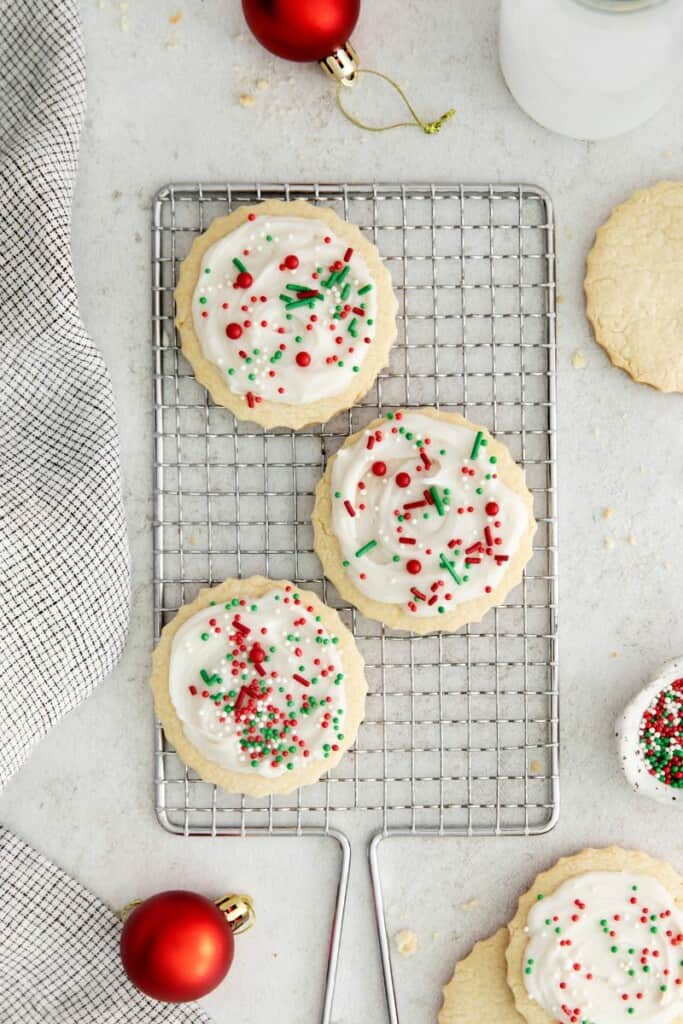
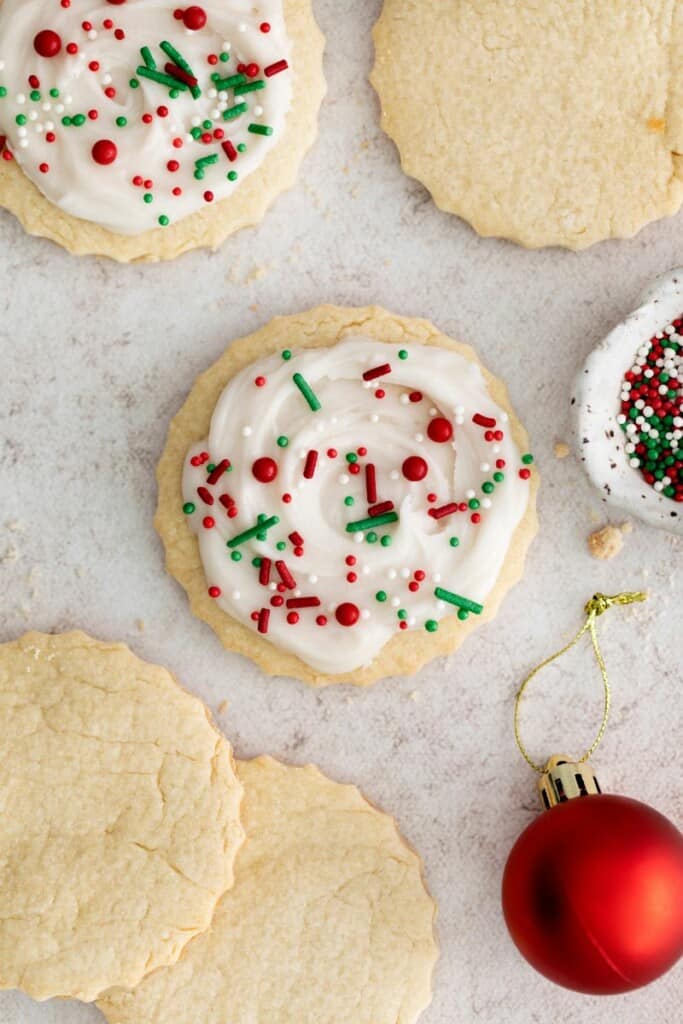
STEP FIVE: Bake the no spread sugar cookies for 10-12 minutes, or until the edges and bottoms become slightly golden brown. Let the cookies cool on the tray, then feel free to decorate them however you like! Store in an airtight container on your countertop or in your pantry for up to 4 days.
How Can I Decorate No Spread Sugar Cookies?
There are several different ways you can decorate your no spread cutout cookies! Considering adding:
- ¼ cup of sprinkles to the dough with the flour to add a pop of color
- A few drops of gel food coloring before combining the butter and sugar
- Cinnamon or pumpkin pie spice along with the flour for a hint of added flavor
- Your frosting of choice after the cookies have cooled
How Do You Make Sugar Cookies Not Spread?
The key is in following my exact instructions above and on the recipe card below. Don’t skip the chilling instructions, and make sure to line your baking sheet with parchment paper.
When you place the cookies on a greased baking tray, they will spread. You can also bake them on a silicone baking mat if desired!
Why Are My Cookies Flat And Spreading?
If you find that your cookies go flat and spread, even after following the recipe instructions to a tee, chances are your oven is too hot. Be sure to set it to 350 degrees F!
How Do I Make My Cookies Fluffier?
Follow the same tips in this no spread sugar cookie recipe! Chill the dough twice and make sure to bake them on parchment paper or a silicone liner.
And, don’t underestimate the power of using real butter!

Other Cookie Recipes You’ll Love:
- Sugar Cookie Recipe Without Baking Soda
- Slice and Bake Cookies
- Christmas Sugar Cookies
- Pink Sugar Cookies
- Cookie Monster Cookies
- Grinch Sugar Cookies

No Spread Sugar Cookies
Ingredients
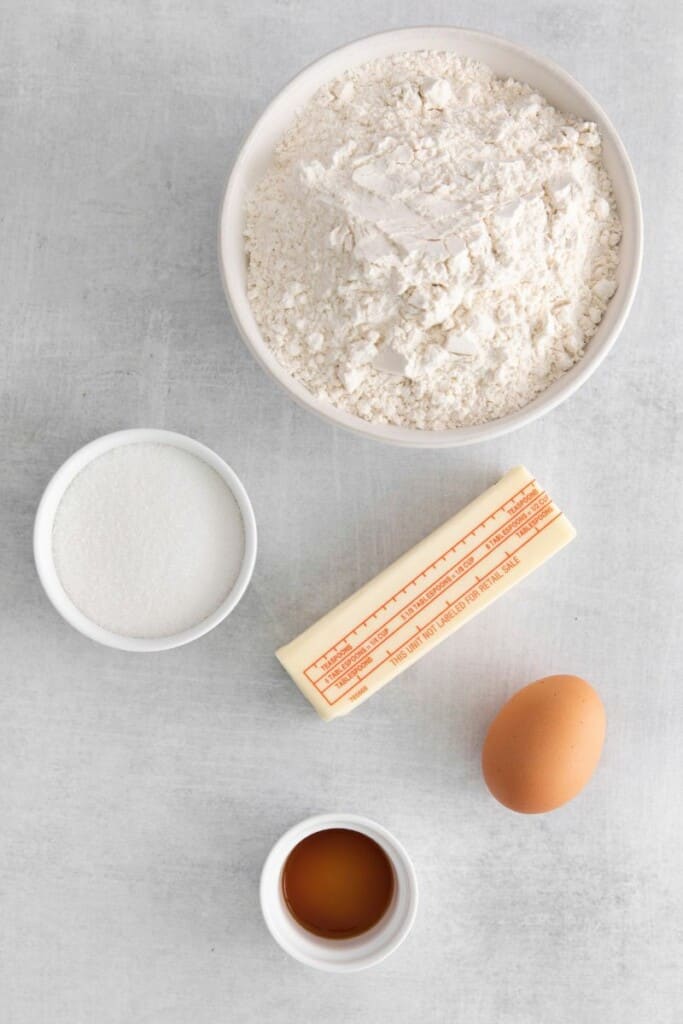
- 1 stick, ½ cup butter, softened
- ½ cup granulated sugar
- 1 large egg
- 1 teaspoon pure vanilla extract
- 2 cups all purpose flour
Instructions
- Add the softened butter and granulated sugar to the bowl of a stand mixer fitted with the paddle attachment. Beat on medium speed until light and fluffy– a minimum of 2 minutes. We want soft cookies so don’t skip this step!
- Next, add the egg and vanilla. Mix to combine and scrape down the sides of the bowl to make sure all of the butter has been incorporated with the egg.
- Next, add the flour and mix just until it is incorporated. You don’t want to overmix as it can result in tough cookies.
- Shape the dough into a 1” thick disc and place it in the fridge to chill for at least 1 hour (or up to overnight).
- When the dough has chilled, unwrap it onto a lightly floured surface and roll it out to ¼” thick. If the dough begins to tear, allow it to sit for a few minutes at room temperature before you continue rolling. If your dough has been chilled overnight, you may need to let it sit for up to 30 minutes.
- Cut out your desired cookie shapes and place them on a parchment lined baking sheet. Re-roll the dough, if desired.
- Place the cookies in the freezer to chill for 30 minutes. While the cookies chill, preheat the oven to 350F.
- When the cookies are chilled, bake them for 10-12 minutes (depending on their size) or until the edges and bottoms are just barely golden brown.
- Allow the cookies to cool completely on the tray. When the cookies are cool, decorate them as desired or store them in an airtight container at room temperature for up to four days.
Nutrition
This nutrition information is based on the exact products I used in this recipe. Brands and sizes of products could alter exact nutrition and should always be calculated independently.
Like this? Leave a comment below!


Do I need to roll these out or can I roll dough into balls and flatten, (similar to what you would do to a peanut butter cookie?) I’m just so over rolling out dough these days.
Hi Rhonda, I recommend rolling the dough on these for even cooking. I usually roll the dough out and use a cookie cutter to cut the shape as shown in my pictures.
Hi, Samantha,
Would these work with low-carb ingredient substitutions? Any suggestions? Thanks for all the great recipes and tips.
EP
Hi EP, A 1:1 low-carb granulated sweetener works great here. I haven’t tested low-carb flours in this recipe, but you can experiment—just expect the texture to shift a bit depending on the flour you choose.