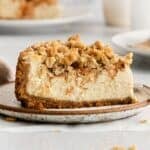
The Best Apple Crumble Cheesecake
My apple crumble cheesecake has layers of a graham cracker crust, caramel cheesecake, apple pie, and a sweet crumble topping. It's an apple pie in cheesecake form!
Servings: 12 servings
Calories: 567kcal
Equipment
Ingredients
For the Crust
- 3 cups graham cracker crumbs
- 8 tablespoons butter melted (one stick)
For the Cheesecake
- 24 ounces cream cheese softened (3 bricks)
- ½ cup granulated sugar
- ½ cup sour cream
- ½ cup caramel sauce
- 2 tablespoons all-purpose flour
- 1 teaspoon pure vanilla extract
- 3 large eggs
For the Apple Crumble
- 2 cups finely diced apple
- 2 tablespoons granulated sugar
- 2 teaspoons cornstarch
- 1 teaspoon ground cinnamon
- ½ cup all purpose flour
- ½ cup light brown sugar
- ½ cup rolled oats
- 4 tablespoons butter melted
Instructions
For the Crust
- Preheat the oven to 350 degrees F and grease a 9” springform pan with nonstick baking spray.
- In a medium bowl, mix together the graham cracker crumbs and melted butter.
- Transfer the mixture to the prepared pan and press it into an even layer on the bottom and 1” up the sides.
- Bake the crust for 10 minutes. Then set it aside.
For the Cheesecake Layer
- Add the softened cream cheese and sugar to the bowl of a stand mixer fitted with the paddle attachment. Beat on medium speed until well combined, about 2 minutes.
- Next, add the sour cream, caramel sauce, flour, and vanilla. Mix them to combine.
- With the mixer on low speed, add the eggs one at a time. Mix it just until the eggs are fully combined.
- Carefully pour the cheesecake on top of the crust and set it aside.
For the Apple Crumble
- In a medium bowl, mix together the apple, granulated sugar, cornstarch, and cinnamon. Spread the apple mixture on top of the cheesecake.
- In another small bowl, mix together the flour, brown sugar, and oats. Add the melted butter and mix until clumps begin to form. Sprinkle the crumble evenly over the apples.
- Bake the cheesecake for 55-60 minutes, or until the center no longer jiggles when shaken.
- When the cheesecake is set, turn off the oven and open the door– but leave the cheesecake in the oven. Allow it to cool to room temperature– about 2 hours.
- Transfer the cheesecake to the fridge and chill until set– at least 4 hours, but preferably overnight.
Notes
- To make sure the crust holds together, press it down firmly with the bottom of a measuring cup before baking. And let it cool fully before adding the filling.
- Do not overmix the cheesecake filling as it can mess with the texture.
- If the top starts browning too quickly, tent it loosely with foil halfway through baking.
- Different ovens can cook at different rates, so start checking on it after 55 minutes to see if it’s set in the center.
- Once the center is set, turn off the oven and prop the oven door open to let it come to room temperature, which can take around 2 hours. This is better than cooling on the countertop and risking messing up the texture when you move it.
- After the cheesecake reaches room temperature, place it in the fridge to finish cooling and setting. I give it at least 4 hours, but think it's even better if it chills in the fridge overnight.
- Store leftovers in an airtight container or covered tightly in the refrigerator for 3 to 5 days or in the freezer for up to 2 months.
Nutrition
Serving: 1 | Calories: 567kcal | Carbohydrates: 55g | Protein: 8g | Fat: 36g | Saturated Fat: 20g | Polyunsaturated Fat: 2g | Monounsaturated Fat: 10g | Trans Fat: 0.5g | Cholesterol: 134mg | Sodium: 460mg | Potassium: 204mg | Fiber: 2g | Sugar: 34g | Vitamin A: 1251IU | Vitamin C: 1mg | Calcium: 109mg | Iron: 2mg